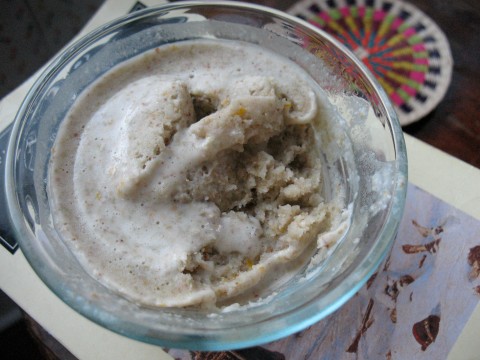
Spiced Pumpkin Bread
November 19, 2011
Man, I love Thanksgiving! “Love” is an exaggeration. It’s an understatement, if anything. I love, love, LOVE opening my google reader and reading all the Thanksgiving recipes, drooling over photos, and scribbling down recipes, notes, and suggestions for Thanksgivings (and meals) to come. Most of the free mental space in my brain, in fact, is dedicated to thinking about Thanksgiving and food.
I have to laugh at myself here because it’s typical that, for the amount of time I spend thinking about Thanksgiving and for the amount of inspiration out there, I’ve done nothing in terms of choosing what recipes to use next week (I could feed off ideas forever; the “getting things done” part is always hardest for me). Thanksgiving is less than a week away, giving me a little bit of time, but if next week is anything like this week in terms of passing by WAY too quickly, then I’m in trouble!
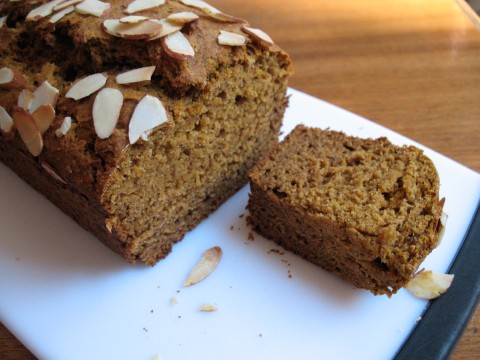
So, even though spiced pumpkin bread isn’t really a Thanksgiving recipe, I felt compelled to make it and share it for a couple reasons. The first is that it’s full of pumpkin and makes your kitchen smell wonderful while it bakes. Second, it seems like a great addition to a post-Thanksgiving brunch spread! My family never did this, but I think I’m going to weasel the day-after brunch into my own Thanksgiving tradition. The bread is perfect, just another great recipe from America’s Test Kitchen! Good luck with your own Thanksgiving preparations!!!
Spiced Pumpkin Bread
(Recipe adapted from The America’s Test Kitchen Healthy Cookbook)
Yields one 8 ½ by 4 ½ inch loaf
Notes: I switched out the granulated sugar called for in the original recipe for honey, and, desirous of a less sweet finished product, added less sweetener than the original. I also threw in some ground flax seeds for good measure, but they are totally and completely optional.
Ingredients:
1 15 oz can pumpkin puree
½ cup honey
1 teaspoon ground cinnamon
¼ teaspoon salt
½ teaspoon ground nutmeg
1 1/3 cups all-purpose flour
2/3 cup whole wheat flour
1 teaspoon baking soda
1 teaspoon baking powder
Optional: 2 tablespoons ground flax seeds
4 tablespoons unsalted butter, melted and cooled slightly
2 eggs
1 teaspoon vanilla extract
Method:
1. In a small or medium saucepan, cook pumpkin puree, honey, cinnamon, salt, and nutmeg over medium high heat, stirring constantly for 5 to 7 minutes or until mixture is thick and glossy. Take off heat and cool. To hasten the cooling process, stir or whisk mixture vigorously for 5 minutes.
2. Preheat oven to 350 degrees F. Grease an 8 ½ by 4 ½ inch loaf pan, and place loaf pan on a baking sheet. Set aside.
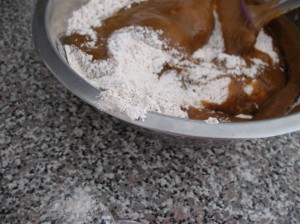
3. In a large mixing bowl, whisk together flours, ground flax seeds (if using), baking soda, and baking powder. In a separate bowl, whisk together cooled pumpkin mixture, butter, eggs, and vanilla.
4. Fold liquid ingredients into dry, taking care not to over mix. The batter will be thick.
5. Scrape batter evenly into prepared loaf pan and smooth top. Bake loaf 45 to 50 minutes, or until a cake tester comes out with just a few crumbs attached, rotating loaf pan halfway through baking time.
6. Let loaf cool in pan 10 minutes before removing loaf and placing it on a cooling rack. Cool loaf at least one hour before serving.
Store loaf either covered tightly with plastic wrap or in an airtight container at room temperature up to three days.
Breakfast Tuesday: Baked Quinoa
November 15, 2011
Not sure about you guys, but I’m always AMAZED by how quickly time flies this time of year. During the first week of November, Halloween feels like it either happened months ago or never happened at all. By mid-November, time has completely warped and I can’t tell difference between morning, afternoon, and night, and certainly can’t be bothered to remember what day of the week it is. It might have something to do with the time change, or the all-consuming fear of impending sucky weather, or the craziness of working retail during the busiest of all retail seasons, but it’s mostly my tendency to completely zone out when busy and stressed.
Finally having time to sit down and look at a calendar, I realized it was Tuesday again. Already? Wasn’t it just Tuesday? I didn’t have time to bake something new and exciting for my breakfast post and was pretty bummed out. I went about my morning business, earlier than usual on account of being busy, and prepared a dish that has become part of my weekly breakfast routine. I had a mini blog-piphany, thinking about how food only makes it into my meal routine if it’s amazing and thinking that it’s high time I share this particular recipe.
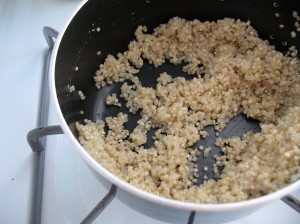
So, while I’m shaking my fists at the sky and wondering what the HECK happened to my week, I leave you with one of my favorite breakfast recipes: baked quinoa. It’s super easy and super satisfying, and I guarantee you’ll find yourself wanting it again and again after making it once. The only change I make is to add one egg instead of two, and sometimes I vary the level of sweetener, depending on my topping of choice. Happy Breakfast Tuesday, everyone!
Breakfast Tuesday: Buckwheat Porridge
November 8, 2011
It’s common knowledge that the most surprising discoveries are those made completely by accident. Today I’m able to present the successful and exciting result of what seemed like a tragic slip-up. The short back story has a little to do with buying grains in bulk and a lot to do with the fact that I should really write things down so I don’t forget. The end of the story is that I came home with some buckwheat groats and had no idea what to do them, or even what to make of them, and almost hit a proverbial wall.
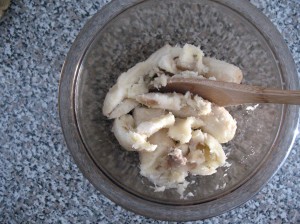
I’m pretty new to buying and using whole grains, so I was standing in front of a small bag of buckwheat groats and feeling like I might as well be looking at pictures of previously unexplored alien landscapes. Thank goodness, though, for both the internet and the abundance of talented, creative cooks out there. When I found a recipe for raw buckwheat porridge, I stopped in my tracks. Firstly, YUM porridge. Secondly, raw food! I’ve always been curious of raw food but my love of baking always drove me in the opposite direction. I soaked the groats, which was an adventure because they get slimy and downright funky feeling but I read that it’s totally normally, and sallied forth, blending all the ingredients together.
The final product was definitely interesting. I liked the taste but I would need a bit of time to get used to the texture. Since I wasn’t thrilled by the texture, I decided to heat it up because my food texture issues dramatically decrease with an increase in temperature (and I really wanted to like it). In heating it up, however, the buckwheat porridge BAKED! The texture was very similar to baked quinoa, which makes sense. I wasn’t a huge fan of the raw porridge, but I love the baked version! I ended up devouring the baked buckwheat porridge and going back for seconds, smothered in jam and almonds. I can’t wait to bake this porridge with pumpkin puree, or peanut butter, or chocolate! Happy Breakfast Tuesday, and cheers to new and exciting discoveries!
Buckwheat Porridge
(Recipe only adapted from Oh She Glows)
Yields 4 cups porridge
Notes: Like most porridge recipes, buckwheat porridge is super easy to customize. I added 1 ½ teaspoons orange zest and ¼ teaspoon cardamom to my first batch, but plan on making different batches with combinations of different ingredients, like pumpkin, cinnamon, coconut, almonds, jam, peanut butter, raisins, and chocolate. In place of the honey, you could use any other liquid sweetener of choice, like maple or agave syrup.
Ingredients:
2 cups raw buckwheat groats
1 ¼ cups milk (regular or nondairy)
¼ cup honey
Pinch of salt
1 teaspoon vanilla extract
Method:
1. In a large bowl, combine groats and 4 cups water. Soak at least one hour or overnight.
2. Rinse groats 2 to 3 times using a fine metal sieve. Set a half cup of groats aside.
3. In another large bowl or food processor, combine the rest of the soaked groats, milk, honey, salt, vanilla and spices or zest of your choice. Blend all ingredients together.
4. To serve raw, simply scoop into bowls and top with toppings of choice. To serve baked or slightly baked, microwave individual servings for a little less than a minute.
Store leftover porridge refrigerated and in an airtight container up to a week.
Soft Pretzels
November 4, 2011
One would think that, after almost one documented year (!) of consistent baking and the many undocumented years prior, I’d know how to read a recipe, or at least know how many times I need to reread a recipe in order to bring a baked good to delicious fruition. Colleen tries to make soft pretzels, take one. Action!
After reading the recipe in its entirety, I read down the ingredients once more to start working on the recipe. I reread the first step and saw that you have to combine everything in the same bowl to make the dough. Really, really, excruciatingly simple! I added the yeast, honey, salt, flour, warm water, and then added the baking soda. As I was adding the three tablespoons of baking soda, I kept thinking how strange it was that you would add so much of a chemical leavening agent to dough that already has one, yeast. If this were a movie, you’d see me in the kitchen with a dramatically exaggerated confused look on my face as I added tablespoon after tablespoon of baking soda, and the text at the bottom of the screen would read, “Weeeeeeeeeird”. If you’ve seen the first Bridget Jones movie, it’d be like the scene where her handsome boss catches her in a lie trying to impress him and there is a not so appropriate expletive that runs across the bottom of the screen while she is looking at him with an expression of total fear and embarrassment. Not the same emotion, but the same concept and funny image.
Soft pretzels are unique because they, like bagels, are boiled before baking. Soft pretzels are boiled not just water, however, but in a baking soda and water solution so they get that characteristic brown coloring. I realized my mistake when I went to boil the water, and couldn’t NOT finish the recipe. I rolled out the dough and shaped the pretzels, which was super fun, then got to boiling and baking. The pretzels were beautiful. Inedible, on account of the baking soda mistake, but beautiful nonetheless. The insides were soft and fluffy, and would have been perfect had I not buggered up the baking soda bit. I can’t wait to make soft pretzels again, though, knowing how much fun the process is, and how great the finished product will be!
Soft Pretzels
(Recipe from Baking Illustrated, an ATK publication)
Yields 12 soft pretzels
Notes: Soft pretzel dough is super stiff, almost too stiff to knead by hand. ATK recommends using a stand mixer or food processor because pretzels come out most flavorful with the appropriate amount of kneading. I’m writing the recipe for a stand mixer, but check out the book if you want the food processor method. Also, check out the book for cheese and cinnamon sugar variations of this recipe. When rolling out pretzels, I found the dough worked best on a surface that was not floured, even though the recipe recommends rolling dough on a lightly floured surface. I also did not roll my dough into 20-inch long ropes, resulting in small, chubby pretzels. To each her own?
Ingredients
For the dough:
1 teaspoon instant yeast
¼ cup honey
1 teaspoon salt
3 cups bread flour
1 cup warm water, around 110 degrees F
Optional: 2 tablespoons kosher salt, poppy seeds, or sesame seeds
For the boiling water:
6 cups of water
3 tablespoons baking soda
Method:
1. In the bowl of stand mixer, stir together yeast, honey, salt, flour, and water.
2. Fit mixer with a bread hook and knead dough at a low speed 5 to 7 minutes, or until dough forms a smooth, elastic ball. Coat a large mixing bowl with a thin layer of cooking oil.
3. Place ball of dough in oiled bowl, flipping dough over so the top is oiled, too. Cover bowl with plastic wrap and let rise in a warm place until doubled in size, 1 to 1 ½ hours. Deflate dough, cover again with plastic, and let dough rise until doubled in size for a second time, between 30 and 40 minutes.
4. Preheat oven to 450 degrees F. Line a large baking sheet with parchment or lightly oiled aluminum foil. In a 12-inch skillet, Dutch oven, or wide pot, bring 6 cups of water and baking soda to a boil.
5. While oven is preheating and water is coming to a boil, form pretzels. Divide dough into 12 equal portions. On a lightly floured surface, roll each portion into a 20-inch long, ½ inch wide ropes. Shape ropes into pretzel form by picking up the ends and crossing them over each other to form an oval and pressing ends over the bottom of the oval. It helped to pinch the dough together there, but a dab of water will also help the ends adhere to oval.
6. When water is boiling, use tongs to place 3 to 4 shaped pretzels face down in boiling water. After 30 seconds, use a slotted spoon to flip pretzels. After another thirty seconds, use tongs to drain pretzels thoroughly and place them directly on prepared baking sheet. Repeat until all pretzels are boiled. Since pretzels will not spread, you can try to fit all 12 pretzels on the same baking sheet. Sprinkle pretzels with salt, if desired.
7. Bake pretzels in preheated oven for 12 to 16 minutes, until pretzels are well browned, turning the baking sheet halfway through baking time. Remove pretzels to a cooling rack and cool until cool enough to eat or room temperature.
ATK says pretzels are best the day they are made, served either warm or at room temperature, but will also keep for two days at room temperature in an airtight container or frozen up to 2 weeks.
