Mint Julep Brownies
October 21, 2011
I want you to close your eyes and imagine the following scene. There’s an open bottle of whiskey on the counter and brownie crumbs, not to mention smears of melted chocolate decorating the countertops, sink, and all unfortunate kitchen appliances within reach. If you watch Arrested Development, think Tobias and blue paint. (If you don’t, watch it. Now.) I’m standing at the counter, in my disgusting pink apron, with a bowl of melted chocolate, holding a spoon en route to my mouth. The chocolate from the spoon is dripping all over the floor. My roommate, K, walks into the kitchen and that’s the first time she sees me today. I’m heartily ashamed, but she takes one look at the whiskey bottle, one look at the floor, and then one last look at me, and then gets really excited and happy that there are good things going on in her kitchen.
These mornings serve to remind me not of my embarrassingly hedonistic tendencies but of how awesome my friends are. She not only continues to take me seriously EVEN after she finds me standing in a pool of dripped melted chocolate and whiskey and eating it out of the bowl before 11 am, but also joins in by taking her finger, running it alongside of the bowl, and picking up rogue brownie crumbs to pop in her mouth. I love these moments so much, when a wonderful relationship, or thing, becomes almost brutally clear. Brutal in the sense that the amazingness and all its parts and manifestations seem simply to be laid out before you and, for a brief second, you can see how perfectly everything fits together.
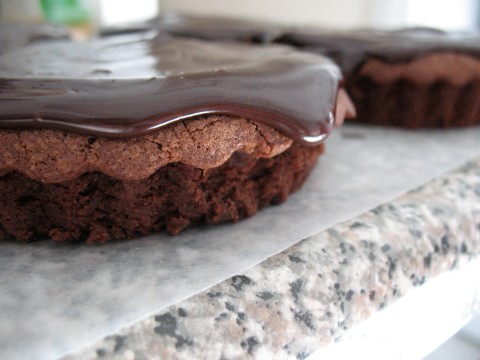
Like these brownies, too, all the flavors work so well together that you’ll consider not eating anything else for the rest of day because, psh, how do you top the mint-chocolate-whiskey combination?!
Mint Julep Brownies
(Recipe adapted from Fragrant Vanilla Cake)
Yields an 8 by 8 inch square pan, serving anywhere from 6 to 9, depending on how you slice
Notes: I halved the original recipe, which made a 9 by 13 inch pan of brownies, and it worked beautifully, so I’m copying down the recipe using half portions. I baked my brownies in four 4 ½ inch tartlet pans with removable bottoms, but in my experience the baking times don’t differ much between the tartlet pans and an 8 by 8 inch square pan. I also omitted the vanilla extract called for originally and used an extra tablespoon alcohol instead. The last note is my use of whiskey instead of bourbon. From what I understand (which is not a whole lot, as you’ll see), some whiskeys are bourbons and all bourbons are whiskey. It’s also what I had on hand, so there’s them apples. My last note concerns the amount of mint; I eyeballed it and may or may not have added more than necessary. I’ve found that mint is easily overwhelmed by chocolate when you bake with it, so I erred on the side of caution, used almost a ¼ cup mint leaves, and was rewarded.
Ingredients:
1/4 fresh mint leaves
1 ½ cups granulated sugar
½ cup, or 1 stick, unsalted butter
3 ounces unsweetened chocolate, chopped
3 eggs
3 tablespoons bourbon/whiskey
¼ teaspoon salt
¾ cup all-purpose flour
Method:
1. Preheat oven to 325 degrees F. If using an 8 by 8 inch square pan, line with foil, leaving an inch and a half overhang on at least two sides, and spray with non-stick cooking spray (a spray especially for baking or a non-flavored oil spray, such as canola). If using removable bottom pans, just coat pans with non-stick cooking spray.
2. If you have access to a food processor, or similar kitchen contraption, combine mint and sugar and process in food processor until mint is very finely chopped. If can’t use a food processor for this step, chop the mint as finely as you can and rub into sugar using your fingertips, until mint is evenly distributed.
3. Melt together butter and chocolate, either in a microwave, mixing every 30 second interval until melted, or in the top of a double boiler.
4. In a medium mixing bowl, combine melted chocolate mixture and mint sugar. Whisk until smooth.
5. Whisk in eggs, one at a time, followed by the bourbon. Whisk until mixture is uniform and smooth.
6. Whisk flour into batter. When batter is smooth, pour evenly into pan(s). Smooth top, making sure batter is distributed evenly.
7. Bake 30 to 35 minutes, until a cake tester comes out with just a few crumbs attached. Be careful not to overbake!
8. Cool brownies in pan until pan is cool enough to handle. Remove brownies from pan and let brownies cool completely (room temperature). Once cooled, top with chocolate ganache (recipe follows). Let ganache set for a few hours before slicing.
Chocolate Ganache
Ingredients:
6 ounces bittersweet or dark chocolate, chopped
¼ cup milk or cream
Optional: 1 teaspoon whiskey
Method:
1. Using a double boiler or microwave, melt chocolate and milk.
2. Stir until smooth, then let cool for 10 to 15 minutes before using.
Store left-over ganache refrigerated and in an airtight container for up to a week.
Birthday Caketivities: Lemon-Mint Cake with Lemon Syrup
July 27, 2011
As it happens, I spend an exorbitant amount of my time thinking about cake. While it’s not surprising, it’s a little embarrassing to say, when talking to people who are not sweet/cake/baking-obsessed, that I spend at least a portion of everyday thinking about cake. These kinds of things cease to be embarrassing, however, when you have a legitimate excuse. It was my birthday last Wednesday, making it totally reasonable for me to think about cake for, oh, the better part of June and July. Totally reasonable, I assure you.
 When I started thinking about my birthday cake in June, I had great aspirations. I’m going to make a super duper tall layer cake! It’s going to somehow contain everything I love, hazelnuts, chocolate, strawberries, buttercream, jam, like some sort of Mary Poppins magical bag. Except a cake. I researched cakes up and down, finding really awesome recipes, like this one and this one.
Time comes for me to bake a cake and, guess what, it’s over a hundred degrees outside. Anyone living in the continental US, and especially in the Northeast, knows how it was. In Boston we’re just not prepared for that kind of heat, mentally, emotionally, or physically. The thought of eating chocolate cake made me wince, as I was sitting in my kitchen beading sweat (a beautiful image, I know). What’s a birthday girl to do? She needs a cake! I remembered my roommate’s herb garden and wanted to somehow incorporate mint leaves, maybe chocolate? I was dead-set on chocolate until finding lemon-mint cake with lemon syrup.
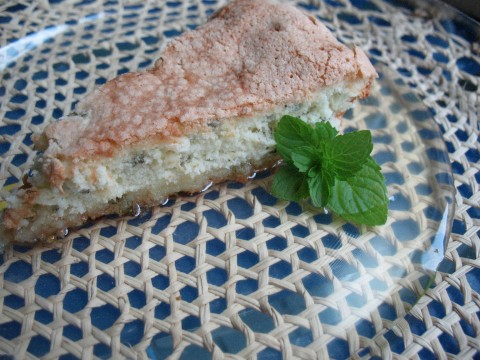
As soon as I stumbled upon this recipe, I knew it was the one. Making it was a funny thing, to me, because the mint leaves made the batter, before adding whipped egg whites, look like quiche filling. I giggled, asking myself “cake or quiche” over and over, until successfully killing the joke. I wanted to whip the whites by hand, even though it was sauna-hot in my kitchen, so ended up doing that and taking forever, but spend the time listening to my favorite music and singing for my roommates. My kitchen shenanigans continue until the very last step, making the syrup, where I pretended to be Chef. Making this cake was so much fun that I forgot the heat. It ended up being a perfect birthday-cake experience, making the cake in a leisurely and ridiculous manner, then eating the cake with my friends- who are the bestest and funniest and most wonderful people you can imagine. Happy Birthday to me!
Lemon-Mint Cake with Lemon Syrup
(Recipe adapted from Giada de Laurentiis at the Food Network)
Yields one 8 inch or 9 inch round cake, enough for 8 to 10 people
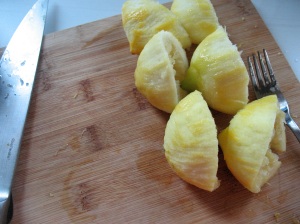
Notes: I zested and juiced 4 lemons, ending up with just a tad more juice and zest than the recipe desires. I added the teaspoon or so of extra zest to cake batter and the extra tablespoon lemon juice to syrup, and everything seems to have worked out!
For the Cake
Ingredients:
3 eggs, separated
1 cup granulated sugar, divided in half
¼ cup vegetable or canola oil
1/8 teaspoon salt
Scant ¼ cup chopped mint leaves (8 mint sprigs)
2 tablespoons lemon juice
1 tablespoon lemon zest
1 cup all-purpose flour
Method:
1. Preheat oven to 350 degrees F. Prepare an 8 inch or 9 inch round pan by buttering and flouring bottom and sides.
2. In a large mixing bowl, whip egg whites to soft peaks. Add one half cup of the divided sugar and beat until stiff peaks.
3. In a separate large mixing bowl, whisk together oil, remaining one half cup of sugar, and salt. Add egg yolks one at a time, then chopped mint, lemon juice, and lemon zest. Fold in flour until just combined.
4. Add one half egg white mixture to flour mixture and stir just to loosen batter. Gently fold in the remaining half of egg white mixture until combined.
5. Evenly pour batter into prepared cake pan. If using an 8 inch round pan, bake cake 40 to 45 minutes, and if using a 9 inch round pan, bake 30 to 35 minutes, until a cake tester comes out clean.
6. Let cake cool to room temperature before slicing.
Cake will keep, covered in plastic wrap at room temperature, up to 3 days.
For the Lemon Syrup
Ingredients:
1 cup granulated sugar
¼ cup water
¼ cup lemon juice
Method:
1. In a small saucepan over medium heat, bring all ingredients to a boil. Reduce heat, and simmer for 5 minutes, stirring occasionally until sugar dissolves.
2. Remove syrup from heat and cool at least 20 minutes before serving.
3. If desired, strain zest from syrup before serving.
Syrup will store, refrigerated in an airtight container, up to a week.
Back on the blogging bandwagon! Woo! If you’ve been reading this blog for any length of time, you’ve already figured out that I am an excuse MACHINE. I could try to justify my week long absence by proffering excuses until you put your foot down and scream, No more! Please! Spare me! Luckily I know, because you’ve all lived in the world and continue to do so, that you understand how some weeks are, how your mind switches to autopilot in order to get everything done. I’ve missed being in the kitchen and I’ve missed writing about my baketivities. Now my schedule is finally normalizing and I can go back to doing what I love best – leisurely AM baking.
In order to keep to blog-schedule, I tried to make breakfast yesterday (for Breakfast Tuesday) and it was the most epic of fails. I don’t think it was the recipe, because it seemed to be pretty solid, so it must have been me, and more specifically my state of mind. This morning, to make up for my Breakfast Tuesday mishap, I wanted to do something breakfast-y but also something quick, as my Wednesdays meaning going into work a little earlier than normal. I remembered reading quite a bit about scones since my last attempt, about how the actual putting together of scone dough should not take more than five minutes. I also read in many, MANY places that using your hands is the best (and only?) way to get the best texture. I haven’t made many scones in my life – due to fear and ignorance – and now that I’m back in the baking game maybe I’ll give it another go?
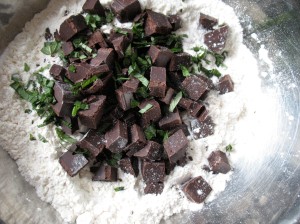
Not to toot my own horn or anything… but the scones were amazing. Tender and light on the inside and crispy on the outside, studded with chunks of chocolate and flecked with fresh, green mint from my roommate’s deck garden. I might be a believer of the hands-only method to scone making. Time will tell. The only thing I would do differently next time is up the mint. The mint got a little overwhelmed by the chocolate and the cream. Other than that, I’m quite content, sitting here, eating freshly baked chocolate scones and writing to you!
Cream Scones with Chocolate Chunks and Mint
(Recipe adapted from Epicurious, originally Lemon Cream Scones)
Yields 12 scones
Ingredients:
2 cups all-purpose flour
¼ cup granulated sugar
1 tablespoon baking powder
½ teaspoon salt
1 ¼ cup whipping cream
heaping 1 cup chopped dark chocolate or semi-sweet chocolate chips
2 teaspoons shredded fresh mint
Method:
1. Preheat oven to 425 degrees F and prepare baking sheets by lining with parchment paper. Lightly flour a clean work surface.
2. In a large bowl, stir together flour, sugar, baking soda, and salt. Add chocolate chunks and mint and mix until even dispersed through flour mixture.
3. Add cream to flour mixture and, with your hands (recommended!) or wooden spoon, mix just until combined. This step should not take more than 20 seconds; there will be chunks of flour and extra wet batter, that’s okay.
4. Turn dough out onto prepared floured surface and knead dough just until it comes together, 4 or 5 times. Pat dough into a wedge ½ to ¾ inch thick and cut into 12 wedges.
5. Place wedges on prepared baking sheet about 1 ½ to 2 inches apart and bake in preheated oven for 15 minutes, until lightly golden on top.
6. Let scones cool on baking sheet for 5 to 10 minutes before removing to a cooling rack to cool until room temperature, or, if you’re impatient like me, until cool enough to eat.
If desired, you can freeze the unbaked scone wedges and bake as needed, adding 3 or 4 minutes to the original baking time. Scones are at there best the day they are made, so I usually bake one or two and freeze the rest for another day!


