I used to worry a lot about all the things I had yet to do, all the places I had yet to see, and all the things I had yet to read, all the people I had yet to meet. In college it would keep me up at night, just thinking and thinking, and worrying. Lots of worrying. I can’t proffer any explanation other than that I was afraid of making choices in the future because I saw each looming choice as something that would cut me off from all other paths, paths that could make me happy, or satisfy me, just as much as the current choice. To a 19, 20, 21 year old, this was a nightmare because I thought it meant I would be somehow blinded and bound by my decisions.

I guess I had always thought that I could live my life without having to make choices and by avoiding them I’d be able to do everything. It was only within the last two years, finishing up graduate school and entering a world full of grown-ups, that I realized making choices would not the end-all be-all of my worldly experience. I’ll never be able to do everything, or travel everywhere, or meet everyone. It’s not possible. I’m seeing more and more that the life choices I make are actually helping me in the sense that they all me to move on to the next choice, see the next thing, meet the next person, etc. Just because you have a path doesn’t mean you have electric fence boundaries. And you can’t ever know where a path will lead you.

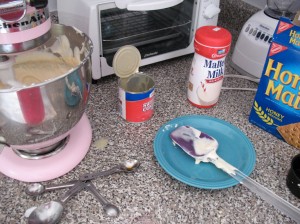
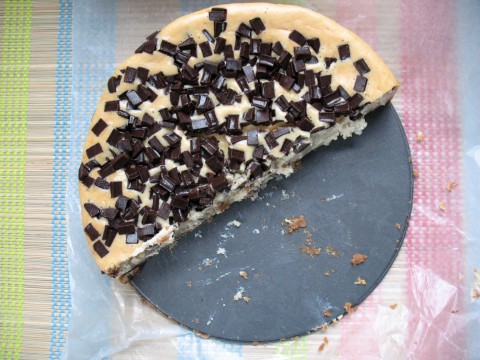
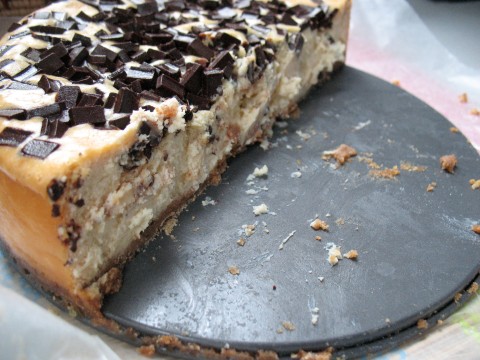
There’s still a long way to go in my quest for something resembling emotional maturity, but I’m working on it. Baby steps. Today’s baby step is cheesecake. I’ve never made a cheesecake before, having heard horror stories and having looked at the amount of time needed to make it, but have always wanted to try. I was intimidated, truth be told, I probably wouldn’t have tried making cheesecake had it not been for this blog. Starting this baking blog was a big life choice for me, and has required a considerable amount of my time and energy. It has also forced me to find new things to make and try making recipes I’ve always tossed aside for some reason or another, and I’m so grateful. Today I’m especially grateful because I get to wake up to homemade cheesecake in the fridge!

Malt Cheesecake

(Recipe adapted from Fake Ginger, originally Chocolate Malt Cheesecake)

Yields one 9 inch cheesecake, enough to serve 10 to 12 people (or two if you’re K and me!)

Notes: I was not at all pleased with the crust and my primary gripe was the amount of butter. There was way too much of it, and next time I will use a different graham cracker crust recipe (probably from Dorie Greenspan in Baking, from my home to yours). I skipped the water bath on account of not having a roasting pan and my cheesecake cracked, so I would not recommend skipping that part of the recipe if you desire a blemish-free product. The cheesecake was amazing plain, but if you want to follow my lead and sprinkle chocolate chips over the top, sprinkle ½ to 1 cup chocolate chips or chunks over cheesecake before baking. My last observation (promise!) is that, once the cheesecake is done baking, you can let it sit in the oven and its water bath for an hour to cool, and that will improve the creamy texture of the cake. I didn’t test it out this time around, but it’s a thought.

Ingredients:

1/3 cup unsalted butter, melted and cooled slightly

3 tablespoons granulated sugar

1 cup graham cracker crumbs

24 ounces, or three 8 ounce packages, regular cream cheese, room temperature

14 ounces, or one 14 ounce can, sweetened condensed milk

¾ cup malt powder

4 eggs

1 teaspoon vanilla

Method:

1. Preheat oven to 300 degrees F. Prepare a 9 by 3 inch springform pan by wrapping the bottom of pan tightly with tin foil.

2. In a medium-size mixing bowl, combine butter, granulated sugar, and graham cracker crumbs. Mix until butter is evenly dispersed and press mixture evenly into the bottom of prepared pan.

3. By hand or using a stand mixer, beat cream cheese in a large mixing bowl until fluffy, about five minutes.

4. Reduce speed, if using a stand mixer, and add sweetened condensed milk. Beat until well blended. Add eggs one at a time, beating for about 30 seconds between each egg, and then add malted milk powder and vanilla. Beat until ingredients are completely combined and smooth. If there are any lumps in the filling they will appear in the final product as well.

5. Pour cheesecake filling evenly over prepared crust. Place springform pan in a large roasting pan and fill roasting pan with boiling water until water line is halfway up the sides of springform pan.

6. Bake cheesecake in preheated oven for 65 minutes, until sides are lightly browned and cake springs back when touched. The center might not look set but if they edges are browned and spring back, you can remove it from the oven. Like most baked goods, it’s important to not over bake cheesecake.

7. As stated in the note preceding this recipe, it’s recommended that the cheesecake cool in the water bath for an hour. If you decide to try it out, turn oven off once cheesecake is done bakingand prop open oven door. Let cheesecake cool in the oven, still in the water bath, for an hour.

8. Remove cheesecake from water bath and remove foil. Be careful as some hot water may be hiding in the foil. Leaving cake in the pan, let cool to room temperature, then cool in the fridge for at least 6 hours or overnight (I’ve heard amazing things about cheesecake left to cool overnight).

9. Remove cake from pan, slice, and serve!

Storage: Cheesecake will store up to a week in the fridge and up to a month in the freezer.

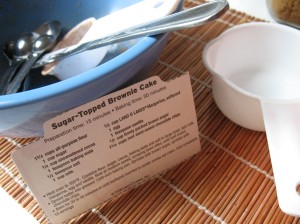
You know those people who keep the recipes from every butter, margarine, cool whip, graham cracker box, pudding box? Those people who have shoeboxes of cardboard recipe clippings dating from god-knows-when until the present? I’m one of those people, guilty as charged. Except the shoeboxes would be a step up on the organizational level for me, right now my cardboard pieces are shoved awkwardly into folders, and the folders shoved wherever there’s space on my bookshelf. I took it upon myself to do some organizing the other day, and part of that plan was to go through my recipe clippings, sort them, then place them into a notebook somehow, making it easier to flip through them and make notes if need be.

As I’m sure you’re all aware, because we live in the world and things happen, my plan started out clear as day and ended up as… nothing. I ended up just sorting through them, oohing and ahhing over the ones that looked good, fondly remembering the ones I’ve made, and not remembering at all why I clipped some recipes in the first place. I think I might have been on the verge of grabbing a notebook when I saw a recipe for sugar-topped brownie cake, peaking it’s head out of the “looks crazy delicious” pile. Not sure why it didn’t stop me before (probably because I was still enthralled by the going-through of recipes instead of starting to organize, hooray for procrastination), but I scooped up the recipe and stuck it to the fridge. This baby’s gettin’ made. No question.

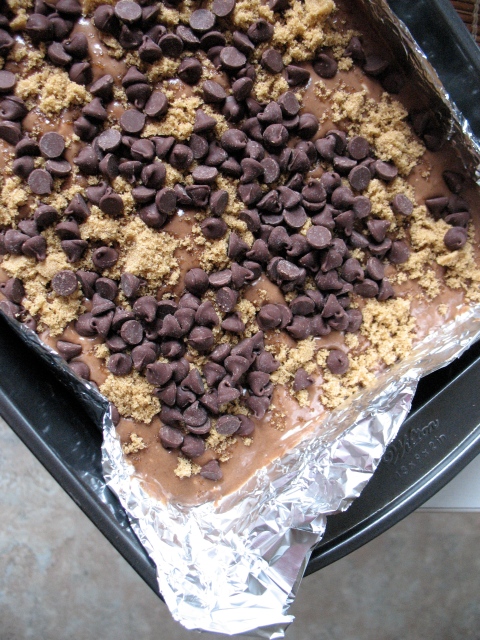
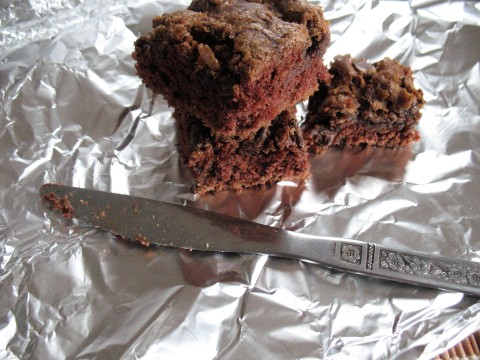
The most interesting part about this recipe is that it turned out RED, as in, red-velvet-cake red. Once upon a time I read that red velvet cake started out as a thing because the cocoa powder reacts with the leavening agent, creating a red color instead of normal chocolate-cake brown, and thus far the phenomenon had remained an abstraction to me. My red velvet cakes didn’t turn out red if I failed to use food dye or some sort of natural coloring agent, and my chocolate cakes didn’t turn out red. This is the first time I’ve seen it in my own baking, with my own eyes. So it really does happen! I can totally understand how red velvet cake became a ‘thing’ and can now appreciate, yet another, example of how science-y stuff applies to baking. Be forewarned that this comes out more like a cake than like brownies. I know the title says “cake”, but it also says “brownie”. Didn’t want you going into it and being disappointed. Now that I’m thinking about the sugar and chocolate crust, though, I doubt you’ll be disappointed, regardless.

Brown Sugar-topped Brownie Cake

(Recipe taken from a Land-O-Lakes package of margarine)

Yields one 9 by 13 inch pan of brownie cake and brownies can be sliced large, around 15 servings


Ingredients:

1 ¾ cups all-purpose flour

1 cup granulated sugar

¼ cup unsweetened cocoa powder

1 teaspoon baking soda

½ teaspoon salt

1 cup milk

½ cup butter, softened (almost melted)

1 egg

1 teaspoon vanilla extract

½ cup light brown sugar, firmly packed

1 ¼ cup chocolate chips or chopped chocolate, dark to semi-sweet


Method:

1. Preheat oven to 350 degrees F and prepare a 9 by 13 inch pan by greasing or lining with foil.

2. In a large mixing bowl, combine flour, cocoa powder, baking soda, and salt.

3. Add milk, butter, egg, and vanilla to dry ingredients and stir until well mixed.

4. Spread batter evenly in prepared pan. Sprinkle brown sugar evenly over top of batter, then do the same with the chips or chopped chocolate.

5. Bake 30 to 35 minutes, until a tester comes out clean. (Check around the 27 mark if you want your brownie cake to be slightly under-baked; I baked it for 30 minutes exactly and got an even cake-like texture but might under-bake it next time.)

6. Let brownie cake cool completely in pan, and cool completely before cutting.

Store brownies at room temperature, in an airtight container for up to 4 days and just covered up to 2 days.

Vegan Peanut Butter Cookies

January 24, 2011

Always looking for an excuse to get together, my friends and I decided to have a little “conference game party” this past weekend to eat, I mean, watch football. Though I’m not a huge sports fan, I appreciate the ability of these events to bring people together. We decided on a finger food theme, and they consented to my bringing desserts! Yay!

One of the things I wanted to bring was some sort of miniature cookie, one that could be eaten in a bite, because of the ooh-ahh-cute value and the practicality of it at a finger food party. This post inspired me, and I was all ready to start cookie production until reading the yield. I’m still super excited to try out the recipe but I didn’t have the motivation to deal with all that dough. And the recipe would have been hard to halve because it called for just one egg. Hard pressed for time and a solution, I turned to the girl who always saves me in such circumstances, Isa Chandra Moskowitz. Minutes later, I had a recipe and an hour or so later, I had cookies!

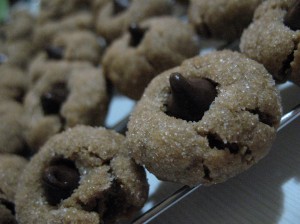
I ended up halving to half this particular recipe, yielding 4 dozen teaspoon sized cookies, in order to make them bite sized, and chocolate chip sized. Perfect! And my favorite part about these cookies is their versatility. You could make them and eat them on their own, or you could put candy in the centers after baking, like the ridiculously adored and well-known peanut butter blossom. I’m sure there are at least dozens of other ways to utilize this cookie base, as well, like making a thumbprint and filling them with jam after baking. Hence the reason I tweaked the name, wanting to highlight their adaptability.

Cute, happy cookies in my sad, dark kitchen.

“Multipurpose” Vegan Peanut Butter Cookies (originally called Peanut Butter Crisscrosses)

(Recipe adapted from Vegan Cookies Invade your Cookie Jar)

Yields 2 dozen cookies, rolling them into generous tablespoon size balls

Ingredients:

½ cup shortening

½ cup peanut butter, chunky or smooth (Isa recommends the natural, no-stir kind of peanut butter, which is what I used, but if you don’t have the no-stir variety, make sure to stir it very well to use it in the recipe)

¾ cup granulated sugar (or brown sugar)

1 teaspoon vanilla extract

2 tablespoons molasses or honey (if using brown sugar, eliminate this ingredient)

1 ¼ cups flour

2 tablespoons cornstarch

½ teaspoon baking powder

½ teaspoon salt

1 to 3 tablespoons (non-dairy) milk

Method:

1. Preheat the oven to 350 degrees F. If you have non-stick baking sheets, there’s no preparation necessary, otherwise grease your cookie sheets or line them with parchment. To get a crispy, brown bottom on these cookies, use dark metal baking sheets.

2. In a mixing bowl large enough to contain all ingredients, cream the shortening, peanut butter, and sugar until the mixture is light and fluffy, 4 to 5 minutes by hand.

3. Mix in vanilla and molasses/honey (if using).

4. Add half the flour, and the rest of the dry ingredients, and stir with a sturdy wooden spoon or using your hands to incorporate the ingredients.

5. Add the rest of the flour and keep combining the dough. If the dough will not stay together when squeezed, add the milk, one tablespoon at a time, mixing in between additions of milk until the dough comes together.

6. Pinch generous tablespoon sized pieces of dough and roll them into balls. From here you could roll them in sugar and bake as is (if you want to add some sort of mix-in on top after baking), or flatten them with the back of a glass and then use a fork to press the crisscross shape into the top of each cookie. These cookies do not spread much at all, so they only need to be an inch or so apart when placed on the baking sheets.

7. Bake each sheet in a preheated oven for 10 to 12 minutes, until the edges are slightly browned.

8. Let the cookies cool on the sheet for 6 to 10 minutes, then transfer them to a rack to cool completely.

Store in an airtight container at room temperature for up to a week, though after 3 days, like most baked goods, the cookies get a tad stale.