Malt Cheesecake (and one big leap for emotional maturity)
September 8, 2011
I used to worry a lot about all the things I had yet to do, all the places I had yet to see, and all the things I had yet to read, all the people I had yet to meet. In college it would keep me up at night, just thinking and thinking, and worrying. Lots of worrying. I can’t proffer any explanation other than that I was afraid of making choices in the future because I saw each looming choice as something that would cut me off from all other paths, paths that could make me happy, or satisfy me, just as much as the current choice. To a 19, 20, 21 year old, this was a nightmare because I thought it meant I would be somehow blinded and bound by my decisions.
I guess I had always thought that I could live my life without having to make choices and by avoiding them I’d be able to do everything. It was only within the last two years, finishing up graduate school and entering a world full of grown-ups, that I realized making choices would not the end-all be-all of my worldly experience. I’ll never be able to do everything, or travel everywhere, or meet everyone. It’s not possible. I’m seeing more and more that the life choices I make are actually helping me in the sense that they all me to move on to the next choice, see the next thing, meet the next person, etc. Just because you have a path doesn’t mean you have electric fence boundaries. And you can’t ever know where a path will lead you.
There’s still a long way to go in my quest for something resembling emotional maturity, but I’m working on it. Baby steps. Today’s baby step is cheesecake. I’ve never made a cheesecake before, having heard horror stories and having looked at the amount of time needed to make it, but have always wanted to try. I was intimidated, truth be told, I probably wouldn’t have tried making cheesecake had it not been for this blog. Starting this baking blog was a big life choice for me, and has required a considerable amount of my time and energy. It has also forced me to find new things to make and try making recipes I’ve always tossed aside for some reason or another, and I’m so grateful. Today I’m especially grateful because I get to wake up to homemade cheesecake in the fridge!
Malt Cheesecake
(Recipe adapted from Fake Ginger, originally Chocolate Malt Cheesecake)
Yields one 9 inch cheesecake, enough to serve 10 to 12 people (or two if you’re K and me!)
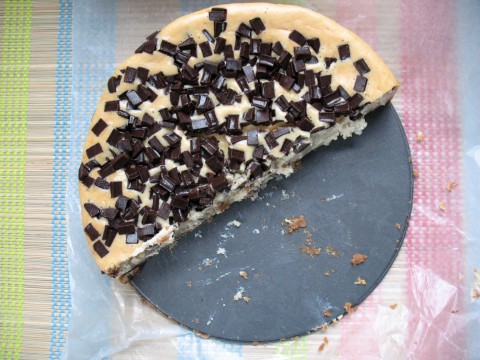
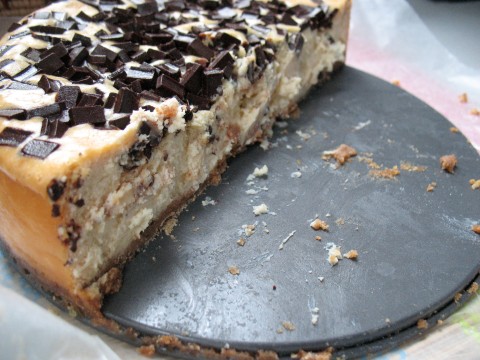
Notes: I was not at all pleased with the crust and my primary gripe was the amount of butter. There was way too much of it, and next time I will use a different graham cracker crust recipe (probably from Dorie Greenspan in Baking, from my home to yours). I skipped the water bath on account of not having a roasting pan and my cheesecake cracked, so I would not recommend skipping that part of the recipe if you desire a blemish-free product. The cheesecake was amazing plain, but if you want to follow my lead and sprinkle chocolate chips over the top, sprinkle ½ to 1 cup chocolate chips or chunks over cheesecake before baking. My last observation (promise!) is that, once the cheesecake is done baking, you can let it sit in the oven and its water bath for an hour to cool, and that will improve the creamy texture of the cake. I didn’t test it out this time around, but it’s a thought.
Ingredients:
1/3 cup unsalted butter, melted and cooled slightly
3 tablespoons granulated sugar
1 cup graham cracker crumbs
24 ounces, or three 8 ounce packages, regular cream cheese, room temperature
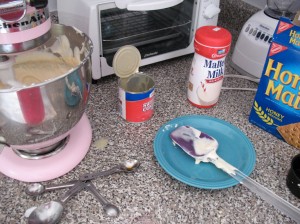
14 ounces, or one 14 ounce can, sweetened condensed milk
¾ cup malt powder
4 eggs
1 teaspoon vanilla
Method:
1. Preheat oven to 300 degrees F. Prepare a 9 by 3 inch springform pan by wrapping the bottom of pan tightly with tin foil.
2. In a medium-size mixing bowl, combine butter, granulated sugar, and graham cracker crumbs. Mix until butter is evenly dispersed and press mixture evenly into the bottom of prepared pan.
3. By hand or using a stand mixer, beat cream cheese in a large mixing bowl until fluffy, about five minutes.
4. Reduce speed, if using a stand mixer, and add sweetened condensed milk. Beat until well blended. Add eggs one at a time, beating for about 30 seconds between each egg, and then add malted milk powder and vanilla. Beat until ingredients are completely combined and smooth. If there are any lumps in the filling they will appear in the final product as well.
5. Pour cheesecake filling evenly over prepared crust. Place springform pan in a large roasting pan and fill roasting pan with boiling water until water line is halfway up the sides of springform pan.
6. Bake cheesecake in preheated oven for 65 minutes, until sides are lightly browned and cake springs back when touched. The center might not look set but if they edges are browned and spring back, you can remove it from the oven. Like most baked goods, it’s important to not over bake cheesecake.
7. As stated in the note preceding this recipe, it’s recommended that the cheesecake cool in the water bath for an hour. If you decide to try it out, turn oven off once cheesecake is done bakingand prop open oven door. Let cheesecake cool in the oven, still in the water bath, for an hour.
8. Remove cheesecake from water bath and remove foil. Be careful as some hot water may be hiding in the foil. Leaving cake in the pan, let cool to room temperature, then cool in the fridge for at least 6 hours or overnight (I’ve heard amazing things about cheesecake left to cool overnight).
9. Remove cake from pan, slice, and serve!
Storage: Cheesecake will store up to a week in the fridge and up to a month in the freezer.
Breakfast Tuesday: Chocolate Malt Pancakes
August 23, 2011
I’m going to present a little anecdote this morning in order to put things into perspective. Imagine me and a few people out to dinner, laughing, talking, eating, the usual. Imagine a black and white (chocolate and vanilla) malt milkshake sitting on the table in front of me, a glass and a metal tumbler filled with extra milkshake, beautiful in its frosty, creamy deliciousness. If it weren’t for the restaurant chain, I’d name myself the dairy queen and if there’s malt powder in my house it’s almost guaranteed that it won’t last the week. About three quarters of the way through dinner one of my friends (a very, very dear friend) asked if they could sample my milkshake. Hah. I blushed because my milkshake had been long gone by the time she asked. It was pretty embarrassing but, hey, chocolate and malt. Chocolate and malt. One of the best flavor combinations of all time.
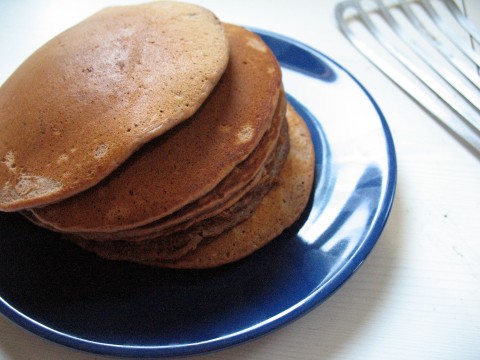
I may not be making milkshakes for breakfast today but I am combining chocolate and malt with another food that I love dearly: pancakes. I’ve made malted waffles with great success and wanted to see if I could do the same with pancakes, adding a little chocolate to the mix as an added bonus. I came across a recipe for pancakes using malt powder at King Arthur Flour and, while liking the flavor, was a little disappointed by how little the malt stood out. Though the malt in the original recipe, linked below, was only added to replicate the taste of the famed diner pancake and not to make a “malt pancake” and, wanting a “malt pancake”, I started adding malt, and more malt, and more malt, and then chocolate, until finding a balance that worked for me.
The pancakes are very good – rich with just a touch of chocolate and a hint of malt flavor – but there’s still room for improvement. I plan on trying these again once I move, maybe with buttermilk and chocolate chips and probably with a lot more malted milk powder. For now, though, maybe try these and see what you think? I’d love ANY suggestions and, if you have a malt-chocolate combination pancake recipe that you think is awesome, let me know!
Chocolate Malt Pancakes
(Recipe adapted from King Arthur Flour)
Yields 10 to 12 pancakes
Ingredients:
2 eggs
1 ¼ cups milk
3 tablespoons melted butter (or unflavored oil, such as vegetable or canola)
1 ½ cups all-purpose flour
2 teaspoons baking powder
¾ teaspoon salt
1 cup malt powder
¼ cup unsweetened cocoa powder
2 tablespoons granulated sugar
Butter for greasing skillet
Method:
1. In a medium bowl, whisk flour, baking powder, salt, malt powder, and cocoa powder to combine.
2. In a separate bowl or large liquid measuring cup, whisk eggs and milk for three minutes until foamy. You can do this by hand or with a mixer. Add melted butter and whisk again until combined.
3. Add dry ingredients to wet ingredients and stir gently to combine, taking care not to over mix.
4. Preheat griddle (or cast-iron skillet) over medium heat and let pancake batter sit for 15 minutes to allow it to thicken.
5. Once griddle is preheated and batter rests up, lightly grease skillet with butter. Scoop batter into pan by the ¼ cupful. When bubbles rise to the surface and bottom is lightly browned, about 2 minutes, and flip pancake and cook until other side is lightly browned. Serve pancakes immediately.
If you want to keep pancakes warm, preheat oven to 200 degrees F while preheating skillet and place pancakes on baking sheet, tented with foil, until ready to serve.


