For whatever reason, I like to pride myself in my waffle-making abilities (read: I feel super awesome when I use my waffle maker because it’s fun and makes pretty foodstuffs for me to eat). This pride makes it really difficult for me to deal when I make waffles and it fails. I can’t help thinking that it has something to do with my internal waffle-making intelligence, like my waffles didn’t turn out because I didn’t will them hard enough. Over all these months of making waffles, I didn’t once think that maybe it wasn’t me but was the machine that caused most of my waffle making-induced suffering. In general I try to shy away from blaming machines with the mentality that blaming a machine can’t really do anything to improve your finished product; all that’s left for you to do is research methods to change a recipe or try a different one altogether.
This morning I experienced a particularly annoying waffle-fail and, instead of taking my usual passive route of shrugging and assuming it’s either the recipe or me, I went straight to the computer, angry and hungry, to see if maybe it actually was the waffle maker. The past few times I’ve tried to make waffles have not turned out well – I took this as supporting evidence in my questioning as to whether or not the waffle-maker is to blame. After ten minutes of reading, folks, I came to the conclusion that it must be the machine. The heat is uneven and my waffles are splitting in half while almost burning (even when the heat is adjusted). It was a good lesson for me to learn though, that when using a kitchen appliance like this you have to take it into account – especially when the recipe seems pretty solid but your finished product is just a pile of waffle.
Yogurt Waffles
(Recipe adapted from Two Peas and their Pod, originally Honey Yogurt Waffles)
Yields 8 to 10 waffles in a Belgian waffle iron
Ingredients:
1 cup whole wheat flour
½ cup all purpose flour
¼ cup rolled oats (or old-fashioned)
2 teaspoons baking powder
¼ teaspoon baking soda
Pinch of ground cinnamon
Pinch of salt
1 ¼ cups milk
¾ cup Greek yogurt, plain
1/3 cup maple syrup, maple syrup blend, or honey
2 large eggs
1 teaspoon vanilla extract
3 tablespoons unsalted butter, melted and cooled slightly
Method:
1. Preheat waffle iron on medium-high setting.
2. In a large mixing bowl, add flours, oats, baking powder, baking soda, cinnamon, and salt. Whisk until combined.
3. In a separate bowl, whisk together milk, yogurt, syrup, eggs, and vanilla extract, until smooth – there shouldn’t be any yogurt lumps.
4. Add liquid ingredients to dry and whisk until just combined. Fold in melted butter until just combined.
5. Grease waffle iron and bake each waffle according to manufacturer’s instructions (until waffle is golden brown).
Serve immediately or freeze up to a month, heating up each waffle individually as needed. While baking waffles, if you want to keep them warm before serving, preheat oven to 200 degrees F and line a baking sheet with foil. Store waffles in oven, on baking sheet, in between making each waffle and before serving.
Breakfast Tuesdays: Conquering Fear of the Scone
February 1, 2011
Because communication is key, I’m going to confess that I fear the scone. Making the scone, at least, because scones are usually my breakfast baked good of choice at any given café. Why, then, do I fear the scone?
The first reason is that they are time sensitive, meaning that as soon as they come to room temperature the quality of the scone decreases rapidly. They are best eaten the day they are made, and if you don’t plan on eating all of the scones right away, you either freeze the dough unbaked, or stick them in the freezer just as they cool to room temperature. Anyone who bakes more than a few times a week understands how your freezer can look after a few weeks, full to the brim of flour and wrapped baked goods.
My second reason isn’t really a reason, but if something means something to you it acquires legitimacy, at least in your head and in your space. Maybe. I might be wrong. Not the point. In my circle of friends, acquaintances, and unknowing “testers”, I am really the only one who prefers scones, and who will heartily enjoy one any moment of any day. I could never expect someone to eat a scone if they don’t prefer them, because I couldn’t offer someone something knowing that they’d rather be eating something else. It would make me feel bad.
The third reason has to deal with preparation and the actual making of scones, not only because I’ve heard horror stories, but I’ve read a ton of scone recipes with very specific instructions. I’ve also read so many different accounts of how a scone “should be” as to puzzle me into paralysis. What if I don’t do it right?
But, ladies and gentlemen, we cannot live in fear forever. In honor of Breakfast Tuesday, I present you with scones. Enjoy with jam or lemon curd or slightly whipped cream, or honey, or whatever your heart desires.
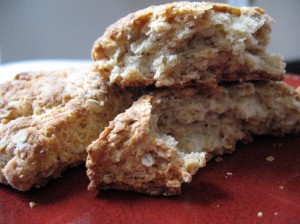
Honey Oatmeal Scones, originally “Oatmeal Nutmeg Scones”
(Recipe adapted from Baking, From my Home to Yours)
Ingredients:
1 2/3 cups all-purpose flour
1 1/3 cups old-fashioned oats (not the quick-cook variety)
2 tablespoons honey (OR 1/3 cup sugar, just make sure to whisk it with the rest of the dried ingredients in step 3)
1 tablespoon baking powder
½ teaspoon baking soda
½ teaspoon salt
¼ teaspoon nutmeg, or cinnamon, or cardamom, or just nutmeg and cardamom, or the spice mix of your choice up to ½ teaspoon
1 egg
½ cup buttermilk (or a teaspoon vinegar mixed with a half cup milk, left to sit for 5 minutes before using)
1 stick and 2 tablespoons, 10 tablespoons, unsalted butter, cold and cut into ½ inch cubes*
Method:
1. Preheat oven to 400 degrees F and line a baking sheet with parchment paper.
2. Stir the egg and buttermilk together in a small bowl. Set aside.
3. Whisk the flour, oats, leavening agents, salt, and spices in a large mixing bowl until the mixture is homogenous.
4. Drop the pieces of butter into the flour mixture and, using your fingers or a pastry blender, cut the butter into the dry ingredients until you see a bunch of pea-sized pieces forming. Keep in mind that there will be pieces of butter of all sizes, which is what you want. This will happen quickly.
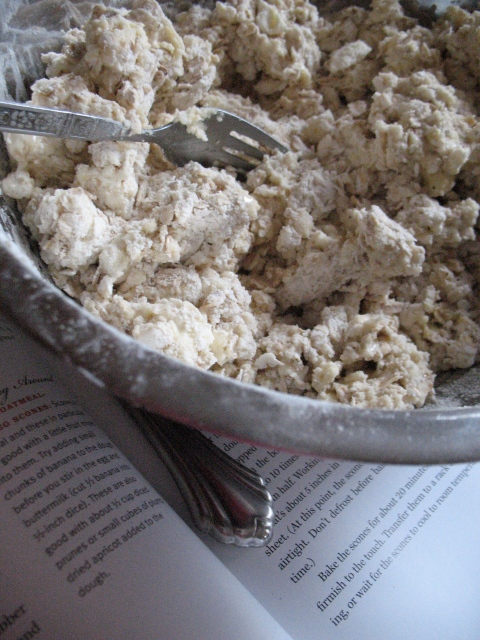
5. Add the egg, buttermilk, and honey to the flour and butter mixture. Stir with a fork just until the dough comes together. The dough will be sticky and a mess, and there might be some flour left unmixed, which is okay.
6. Knead the dough gently or fold with a sturdy spatula, between 8 and 10 turns.
7. Split the dough in half. Place one half on a lightly floured surface and press it into the shape of a disk, 5 inches in diameter and 1 inch thick. Cut into wedges, and place on prepared baking sheet.
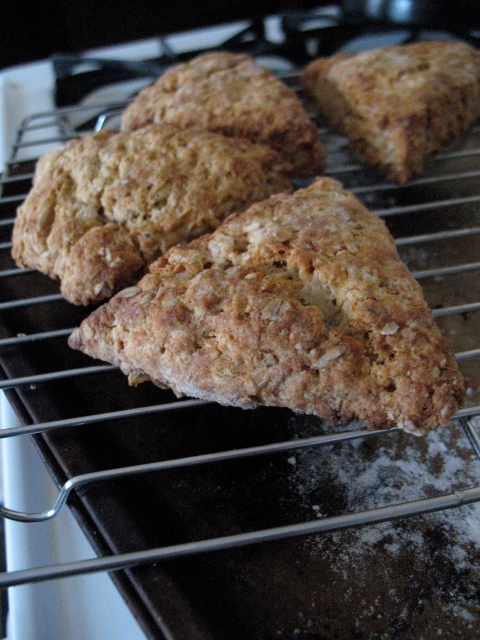
8. Bake in preheated oven for 20 to 25 minutes, though keep an eye on them. Mine almost burned after exactly 20 minutes. The tops should be golden brown.
9. Form and cut the remaining dough and repeat the baking process OR freeze them on a baking sheet and place them, after freezing, in an airtight container to bake later, adding 2 minutes to the original baking time.
10. Let scones cool on a baking rack for at least 10 minutes before serving.
Scones don’t keep well, so once the extra scones come to room temperature, wrap them in an airtight container and stick them back in the freezer. I’ll probably keep a few in an airtight container for the next day, but will freeze the rest. Reheat the already baked scones in the oven when you need them.


