Breakfast Tuesday: Grilled Cheese?!
March 22, 2011
This should be embarrassing, but I’m taking it as evidence of my extraordinary love of sweets and utter dedication to my craft. I spent the last three nights in a row researching the ultimate dessert grilled cheese. There are tons and tons of recipes/ideas/thoughts concerning this monumental idea, but you have to be careful and wade through them with a watchful eye. Dessert grilled cheese with chicken? Think again.
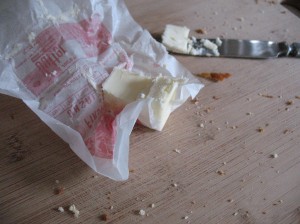 You don’t need a recipe to make dessert grilled cheese. It’s entirely up to you and your desires, your cravings, your culinary creativity. There are great combinations to explore and all kinds of cheese and bread to utilize, like macerated strawberries with mascarpone and honey, or nutella, cream cheese and raspberry jam.
The recipe I present to you is simply my view of a perfect dessert grilled cheese using ingredients commonly found in the baker’s kitchen. Dessert and breakfast are sometimes synonymous to me, which is why you are getting dessert grilled cheese on a Breakfast Tuesday, but just like the ingredient combinations, the meal possibilities for this grilled good seem almost as limitless. I thought of it as breakfast because, with the days getting warmer, I’m spending a lot more time on my feet and needing an extra caloric splurge here and there. The needing could come from my sugar addiction and not from extra exercise, but that’s another story for another time.
Enjoy, and if you have any awesome takes on the dessert grilled cheese, let me know!
Dessert/Breakfast/Sweet Grilled Cheese, Take One
Ingredients:
1 oz cream cheese
1- 2 tablespoons peanut butter
1 scant tablespoon chocolate chips or chopped dark chocolate
Half of a banana, thinly sliced
1 teaspoon cinnamon sugar blend
1 tablespoon unsalted butter for greasing skillet
2 slices brioche, french bread, challah, texas toast, or bread of your choosing!
Method:
1. Preheat skillet over medium heat. If your stovetop is notoriously hot, preheat over medium low heat to avoid burning. This sandwich takes a little bit longer to heat through than normal grilled cheese.
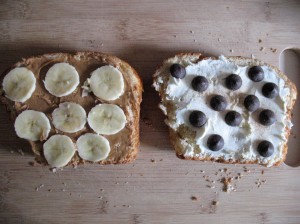
2. Spread one slice of bread with cream cheese and sprinkle chocolate chips over cream cheese layer. Spread other slice of bread with peanut butter and sliced banana. Sprinkle cinnamon sugar evenly over prepared bread slices. Smoosh bread together to make a sandwich.
3. When skillet is preheated, place one tablespoon butter in skillet to melt and place sandwich in skillet.
4. Grill sandwich on each side until warmed through, 4 to 5 minutes on each side, covering if necessary.
Serve immediately.
Bostock. What?
February 9, 2011
My kitchen has turned into an ocean of brioche. It’s everywhere, on the counter, in the fridge, in the freezer, in my bag to go to work, you can’t escape it. I’m trying to think of different ways to use this sliced brioche that is now a day old when I see a recipe for almond cream and a pastry called bostock. After reading about this treat, the only question I can ask myself is “How have I NEVER heard about this?!”
When you google “bostock”, you come upon the same thing with each result; people tried it in a bakery, or read about it, or heard about it, then asked where it has been their whole life, and then set about making it. I love this, how a pastry can come out of nowhere, surprise the heck out of you, then make itself a part of your life. Not to go off on one of my “beauty is everywhere” tangents, but food is sometimes overlooked when talking about cultures and life and sharing, and that’s a shame because everyone has very unique palates and dishes that feel like home, which can be shared even across language barriers. Okay, done.
In my research I learned that traditional bostock is dipped in almond syrup before being coated with cream and baked. Unfortunately, I found this after putting mine in the oven. Maybe next time.
The end product wasn’t pretty, because I decided to not follow instructions and not leave a border of bread around the cream, but my goodness gracious, it was good. So good, in fact, that I just wanted to stick my face in it, and then make a billion of them to give to everyone I know. Just when you think you could get bored of something, bostock comes along and saves the day.
Before signing off for today, I need to make a confession. Remember, yesterday, when I said that perhaps all the extra effort in brioche dough isn’t worth it? I’m officially eating my words, after sampling the brioche buns made with dough that needs crazy amounts of attention and ingredients. There is definitely a difference, and the extra steps are worth it if you have the time and energy. I’ll be posting that particular recipe on Friday morning! Be excited! And then be excited that I’ll talk about something other than brioche!
Almond Cream
(Recipe adapted from Baking, From my Home to Yours)
Yields 1 ½ cups almond cream
Ingredients:
¾ stick, or 6 tablespoons, unsalted butter, room temperature
2/3 cup granulated sugar
¾ cup ground almonds (almond meal works as well)
2 teaspoons all-purpose flour
1 teaspoon cornstarch
1 egg
1 teaspoon vanilla extract (or 2 teaspoons dark rum)
Method:
1. Using a stand mixer or a sturdy spoon, cream butter and sugar until smooth.
2. Add almonds and beat to incorporate them completely.
3. Stir in flour and cornstarch until flour disappears.
4. Add egg and beat mixture until homogenous.
5. Stir in vanilla extract (or rum).
Use immediately or store refrigerated in an airtight container for up to three days.
**Dorie says you can even bake this as a custard in ramekins, and I found that the almond cream spilled over the edges and baked into delightful almond cookies. The possibilities are practically endless, guys!
Bostock
Ingredients:
As many thick slices (up to and including an inch thick) of stale, day-old brioche, or challah, as desired
Almond cream
Method:
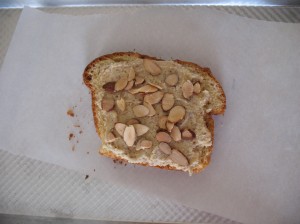
[Optional step: Toast a handful of slivered almonds on a baking sheet for 5 minutes in a 350 degree F oven.]
1. Preheat oven to 350 degrees F and line a baking sheet with parchment paper.
2. Spread two or three tablespoons almond cream on each slice of bread, making sure to leave an inch thick border of bread. The almond cream spreads. [Sprinkle with toasted almonds.]
3. Bake for 10 to 15 minutes, until the cream looks set around the edges.
4. Eat!
I would not try to store bostock, because it is simple to make as needed and heavenly out of the oven.
Breakfast Tuesday: Brioche French Toast
February 8, 2011
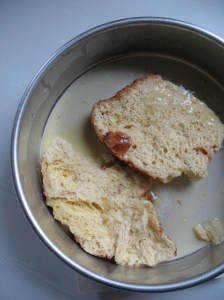
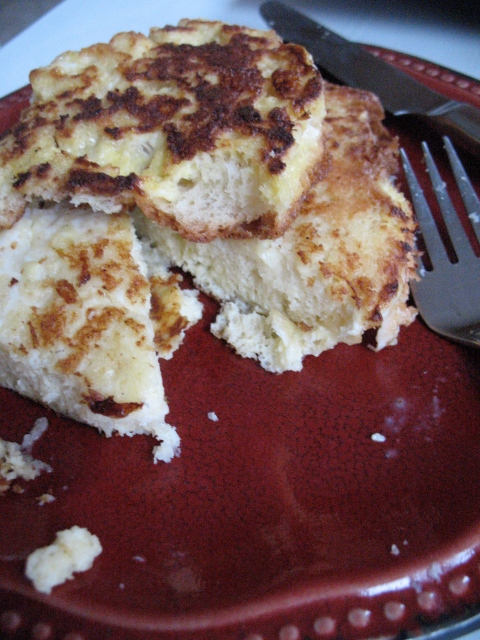
Breakfast Tuesday! My favorite day of the week! I repeat myself a lot and exaggerate… A LOT, but today I’m super excited to share my day off breakfast treat because I put some work into it and because it’s something that is crazy decadent. My favorite kind of breakfast is a ridiculous, zero nutritional value, almost-dessert, something like brioche french toast!
I won’t bore you with the details of the French toast making, because we all have our own special way of preparing it, but I will share some of my brioche experiences. The entirety of my Monday consisted of preparing three different batches brioche dough from three different people. Last week, reading the recipes, I realized that most brioche dough must sit overnight, and some even require TLC every two hours before you are ready to use it. Some you can freeze, some you need to use a sponge, some you NEED a thermometer, you name some sort of baking instruction, it was there. I’m a bit lazy and extremely impatient, so the question became, “Are all these crazy extra steps worth it for the 23 year old home baker?”
The part of me that loves projects and challenges says “Heck yes! I don’t want to settle and take the easy route!” The part of me that just wants some brioche French toast and doesn’t feel like going to the market and spending five dollars on a brioche roll says “There has to be middle ground.” Surprisingly enough, I got over the laziness and made a bunch of brioche to conduct some rigorous taste testing.
I’m still working on the loaves that need extra time, because my kitchen is freezing, but I will share the recipe for the baked loaf in the pictures. How well the brioche turned out, even though it didn’t need to sit overnight and be punched repeatedly, surprised me. It certainly rivals market brioche, and definitely trumps hugantic chain grocery store brioche.
I will let you know how the rest of brioche baking goes. I have brioche buns filled with jam, another regular loaf, a raisin swirl loaf, and some dough frozen for sticky buns. Too much brioche? Nonsense.
“Breakfast Loaf” Brioche
(Recipe adapted from Bake! Essential Techniques for Perfect Baking)
Yields enough dough for one 9 by 5 inch loaf
Note: This recipe is a whole lot easier with the bread hook of a stand mixer, but I was able to do it without, and will write the recipe without use of the mixer. If you have access to a mixer, this recipe will be a cinch!
Ingredients:
Sponge
1/3 cup lukewarm milk, about body temperature*
2 ½ teaspoons, or one envelope, active dry yeast
¼ cup warm water, around 110 degrees F*
¾ cup bread flour
*The temperature is important because the yeast will be killed if the liquids are too hot.
Dough
2 eggs, room temperature
2 egg yolks, room temperature
3 tablespoons granulated sugar
All of sponge, recipe from above
2 cups bread flour
1 teaspoon salt
½ cup, or 8 tablespoons, butter, softened, plus extra for buttering pans and bowls
Egg Wash
1 egg, whisked
Method:
1. Sponge: In a cereal size bowl, whisk the yeast into the warm water. Wait 2 minutes, then whisk again to make sure all yeast granules are dissolved. Whisk in warm milk. Fold in flour with a spatula or wooden spoon, until smooth. Cover the bowl in plastic, and let sit for 30 minutes or until more than doubled in size.
2. In the bottom of a large bowl, large enough to contain and knead all the dough, stir the eggs and yolks together.
3. Stir in the sugar, and then scrape all the sponge into the egg mixture.
4. Add flour, one cup at a time, and the salt, mixing it into submission after each addition. Mix until the dough comes away from the sides of the bowl, between 10 and 15 minutes. I suggest using your (clean) hands for this process.
5. Add the butter in three parts, continually mix until the butter is absorbed into the dough, not just melted around the outside.
6. Knead dough until it is smooth, shiny, and feels like elastic, 10 to 15 minutes more.
7. Place dough into a large, buttered bowl, then flip over to make sure top of dough is coated in butter.
8. Let the dough rise until doubled in size, 30 minutes to an hour depending on the temperature of your kitchen. If your kitchen is in the 70 degree F range, 30 minutes should suffice. Once the dough has risen, you can place it in the fridge until ready to use, or use it right away. If you do put it in the fridge, make sure it comes to room temperature before shaping it for the loaf pan.
9. Prepare a loaf pan by buttering it generously. Make sure you butter the rim as well, because the brioche will try to escape over the sides.
10. Flour your hands, and remove the dough from the bowl. Round the dough by bringing the sides underneath it, tightening the skin on top, being careful not to deflate it too much. Once rounded, shape it into a loaf pan sized rectangle. Transfer dough to prepared pan.
11. Cover the pan with plastic, and let rise until dough comes 1 to 1 ½ inches above the pan. This process takes 30 minutes to an hour, again, depending on the temperature of your kitchen.
12. While bread is rising, preheat oven to 375 degrees F.
13. Before baking loaf, brush top with egg wash. Be careful not to let the egg drip down the outside of the pan.
14. Bake loaf until well-risen and golden brown, 30 to 35 minutes.
15. Let cool in pan for 10 minutes before tipping it out onto a cooling rack. Let loaf cool completely on its side to avoid deflation.
Brioche is pretty much ambrosia out of the oven, right after it cools, but you can keep it, at room temperature or in the fridge, in an airtight container for a few days. You could also freeze it for up to a month.
