Bananas. I’m not sure I could do with out them. So you’ll understand my feelings when, right after returning home from the grocery store, I dropped my precious four bananas on the ground. The horror! Dropping any fruit is bad, but I feel like bananas take it the worst. The insides turn to banana pulp! Crazy! And the way I dropped them was such that more than half of each banana was horribly bruised by the impact. I tried opening one to eat but couldn’t do it without a spoon, and I was a little put off by the bruising. Feeling sad and defeated, I put them in the fruit basket and tried to forget about the whole incident.

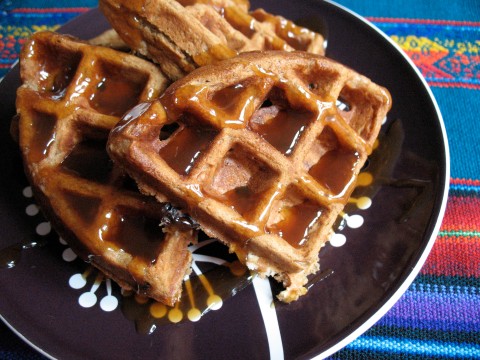
About four days later, the bananas started to get spotty. I was worried; I didn’t want to throw them out but didn’t want to eat them as is. What was I to do? A little voice sounded inside my ear and said things like, “You bake things! Bake banana things! You paid for those bananas! Use them!” I usually eat bananas too quickly to allow them to ripen, which means I don’t get the chance to bake with them. Not this time! So all is not lost, in fact, my love for banana baked goods is found again, especially with these waffles. The banana flavor isn’t pronounced, but you know it’s there, and you’ll love how the banana is complimented by oatmeal, cinnamon, and raisins. I’m going to count the banana dropping as a blessing this morning (but I promise to be more careful next time). Happy bananas for breakfast! Happy Breakfast Tuesday!

Oatmeal Banana Raisin Waffles

(Recipe only slightly adapted from Vegan with a Vengeance)

Yields exactly 4 Belgian waffles or up to 12 regular waffles

Notes: Instead of using both all-purpose and whole-wheat flour, you can use one cup and two tablespoons all-purpose flour. If you decide to use quick cooking oats, you don’t need to soak the oats in liquid mixture before adding to dry ingredients. If you don’t have nondairy milk on hand and/or don’t require waffles to be vegan, substitute whatever milk you have on hand.

Ingredients:

½ cup plus 2 tablespoons all-purpose flour

½ cup whole-wheat flour

2 teaspoons baking powder

1 teaspoon baking soda

1 ¼ teaspoon ground cinnamon

¼ teaspoon ground nutmeg

½ teaspoon salt

1 cup rolled, or old-fashioned, oats

1 very ripe banana, mashed well

1 ½ cups nondairy milk

3 tablespoons maple syrup

3 tablespoons vegetable oil

¾ raisins

Method:

1. In a large mixing bowl, whisk together flour, baking powder, baking soda, cinnamon, and nutmeg.

2. In a medium-size mixing bowl, mix together oats, banana, milk, syrup, and vegetable oil. Let mixture soak for 10 minutes while you preheat the waffle iron.

3. After ten minutes, pour wet ingredients into dry and mix just until combined. A few lumps will remain. Fold in raisins, taking care not to over mix.

4. Waffle according to manufacturer’s instructions, greasing waffle iron between waffles.

If you would like to keep the waffles warm between taking them off the iron and serving, preheat the oven to 200 degrees while the oatmeal is soaking and keep waffles in the oven, on a baking sheet lined with foil, up to 30 minutes before serving. Waffles will keep, refrigerated, up to a week, and frozen up to a month.

I seem to be suffering from the never-ending cold, complete with new and different symptoms every few days. You know how when you are sick words on pages seem to dance circles around you? And the pictures seem to jump up off the page and wander? This made it very difficult for me to research my Variety Flour Thursday pick this week, but nothing is impossible. I gathered my blankets and shuffled to the kitchen to survey my cookbooks and ingredients.

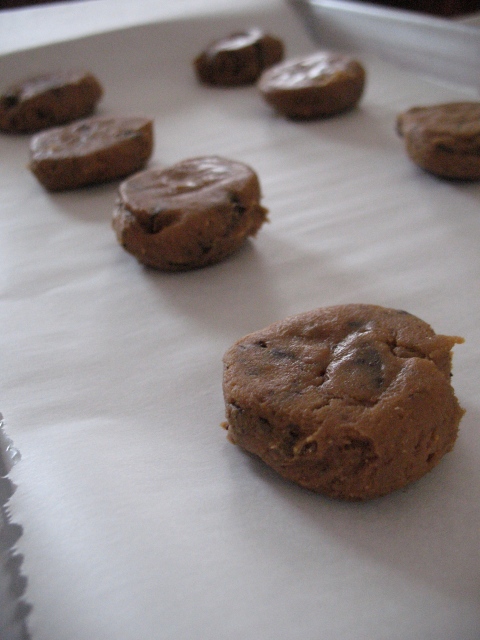
I never tired of cookie dough landscapes, especially this one, flecked with blood orange zest!

Luckily for me, I had blood oranges in the fridge and agave nectar in the pantry. I can present a cookie that is a little out of the common way, containing significantly less refined sugar than your average cookie. My mother went on an agave nectar spree last year, either buying it for everyone she knows or convincing them it’s the miracle sweetener we’ve been searching for all these years. I was a grateful recipient and used it on pancakes and in tea. I hadn’t used it to bake before this recipe and now that I’ve seen the results, I’ll try using it more often.

And blood oranges? There’s nothing to be said about this extraordinary fruit. It’s my favorite and makes a wonderful addition to most baked goods (and my life).

Orange Agave Chocolate Chip Cookies

(Recipe adapted from Vegan Cookies Invade your Cookie Jar)

Yields 2 dozen generous tablespoon size cookies

Ingredients:

2/3 cup agave nectar

2/3 cup canola oil

2 tablespoons nondairy milk (or water in a no-milk emergency)

(Optional: 1 tablespoon ground flax seeds)

1 ½ teaspoons vanilla extract

1 tablespoon orange zest (grated zest of one orange approximately)

1 ½ cups all-purpose flour

1 cup whole wheat flour

¾ teaspoon baking soda

¼ teaspoon salt

1 cup, or 6 ounces, chocolate chips or chopped chocolate

Method:

1. Preheat oven to 325 degrees F and line two baking sheets with parchment paper.

2. In a large bowl, whisk agave nectar, oil, nondairy milk, flax seeds if using, vanilla extract, and orange zest until smooth and homogenous.

3. Sift in flours, leavening agents, and salt. Stir to combine, until there are no flour streaks.

4. Add chocolate chips. Stir to incorporate.

5. Form cookies into generous tablespoon-sized disks. These cookies barely spread and rise only slightly, so how they look before baking will be how they look after baking.

6. Bake each sheet in the oven for 12 to 14 minutes, until the edges are slightly golden.

7. Let cookies cool on baking sheet for at least 5 minutes before removing them to a cooling rack to cool completely.

Store these cookies in an airtight container at room temperature for up to 5 days.

See this recipe on Sweet As Sugar Cookies for Sweets for a Saturday #7!

A burst of blog inspiration hit me this morning, along with an unexpected sunbeam that hit my face through the window this morning. What if I did some sort of alternative flour recipe once a week, say Thursdays? I’m always looking for ways to incorporate new and different ingredients into my baking, especially flours. Until a year ago, it had never occurred to me to utilize all the wonderful and unique flours on the market in my baking. For some reason, ignorance mostly, I assumed you only used other flours to make bread. I’ll need to think of a catchy name, but count on a variety flour recipe every Thursday from now on, in addition to my tradition of Breakfast Tuesday.

I spent the better part of the morning researching cookie recipes that featured peanut flour, because my last peanut flour baking adventure failed miserably. Note to self, if you use even a TEENY bit of peanut flour in a pumpkin cookie, you will ONLY taste the peanut flour. I needed a complimentary flavor that could hold its own against any ingredient under the sun, and what better than dark chocolate?

There’s a note in the recipe, but I wanted to say again that I added an extra half-cup of peanut flour to my cookies, but the recipe called for just a cup. This is due to the fact that I really enjoy meaty, chewy, soft, almost-but-not-quite brownie textured cookies. If you decided to go with just a cup of peanut flour, eliminate the water or milk at the end. The dough will be manageable enough without it.

Peanut Flour Chocolate Chip Cookies

(Recipe loosely based on this cookie, by the same name)

Yields about 2 dozen tablespoon-size cookies

Ingredients:

1 cup peanut flour (if you prefer chewy, thick cookies like I do, then add an extra half cup peanut flour)

½ cup all-purpose flour

Generous pinch baking powder

Generous pinch baking soda

Generous pinch salt

½ cup, or 8 tablespoons, unsalted butter, room temperature

¾ cup brown sugar, lightly packed

1 tablespoon molasses

2 eggs

1 teaspoon vanilla extract

1-2 tablespoons water or milk

1 cup, or 6 oz, chopped dark chocolate or semi-sweet chocolate chips

Method:

1. Preheat oven to 375 degrees F. Prepare baking sheets by lining them with parchment paper. If they are non-stick sheets, the only preparation you need worry about is getting them out.

2. Cream butter until smooth, then add the brown sugar and molasses. Cream butter and sugar until sugar is incorporated into the butter.

3. Add eggs, and stir dough until the eggs are combined. Stir in vanilla extract.

4. Add both flours, leavening agents, and salt. The dough will be very sticky, and you’ll need some elbow grease to mix it together. Add water or milk a tablespoon at a time until all the flour is incorporated.

5. Fold in chocolate until it is distributed evenly throughout the cookie dough.

6. Roll dough into tablespoon size balls, and flatten them with your hands so they look like little cookie flying saucers. Place them an inch apart on the cookie sheet (they won’t spread much at all).

7. Bake each sheet of cookies for 10 to 12 minutes, until the tops are cracked and look dry. My cookies needed the full 12 minutes.

8. Cool on baking sheets for just a minute before removing them to a cooling rack to cool completely.

Store cookies, once cooled to room temperature, in an airtight container for up to 5 days.