Bananas. I’m not sure I could do with out them. So you’ll understand my feelings when, right after returning home from the grocery store, I dropped my precious four bananas on the ground. The horror! Dropping any fruit is bad, but I feel like bananas take it the worst. The insides turn to banana pulp! Crazy! And the way I dropped them was such that more than half of each banana was horribly bruised by the impact. I tried opening one to eat but couldn’t do it without a spoon, and I was a little put off by the bruising. Feeling sad and defeated, I put them in the fruit basket and tried to forget about the whole incident.

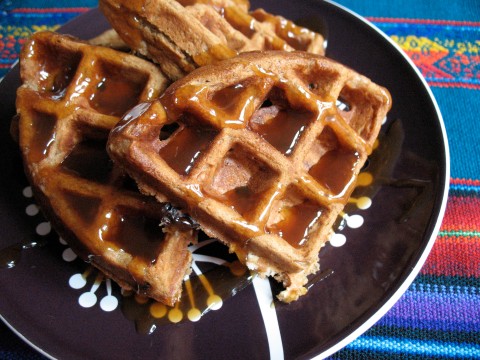
About four days later, the bananas started to get spotty. I was worried; I didn’t want to throw them out but didn’t want to eat them as is. What was I to do? A little voice sounded inside my ear and said things like, “You bake things! Bake banana things! You paid for those bananas! Use them!” I usually eat bananas too quickly to allow them to ripen, which means I don’t get the chance to bake with them. Not this time! So all is not lost, in fact, my love for banana baked goods is found again, especially with these waffles. The banana flavor isn’t pronounced, but you know it’s there, and you’ll love how the banana is complimented by oatmeal, cinnamon, and raisins. I’m going to count the banana dropping as a blessing this morning (but I promise to be more careful next time). Happy bananas for breakfast! Happy Breakfast Tuesday!

Oatmeal Banana Raisin Waffles

(Recipe only slightly adapted from Vegan with a Vengeance)

Yields exactly 4 Belgian waffles or up to 12 regular waffles

Notes: Instead of using both all-purpose and whole-wheat flour, you can use one cup and two tablespoons all-purpose flour. If you decide to use quick cooking oats, you don’t need to soak the oats in liquid mixture before adding to dry ingredients. If you don’t have nondairy milk on hand and/or don’t require waffles to be vegan, substitute whatever milk you have on hand.

Ingredients:

½ cup plus 2 tablespoons all-purpose flour

½ cup whole-wheat flour

2 teaspoons baking powder

1 teaspoon baking soda

1 ¼ teaspoon ground cinnamon

¼ teaspoon ground nutmeg

½ teaspoon salt

1 cup rolled, or old-fashioned, oats

1 very ripe banana, mashed well

1 ½ cups nondairy milk

3 tablespoons maple syrup

3 tablespoons vegetable oil

¾ raisins

Method:

1. In a large mixing bowl, whisk together flour, baking powder, baking soda, cinnamon, and nutmeg.

2. In a medium-size mixing bowl, mix together oats, banana, milk, syrup, and vegetable oil. Let mixture soak for 10 minutes while you preheat the waffle iron.

3. After ten minutes, pour wet ingredients into dry and mix just until combined. A few lumps will remain. Fold in raisins, taking care not to over mix.

4. Waffle according to manufacturer’s instructions, greasing waffle iron between waffles.

If you would like to keep the waffles warm between taking them off the iron and serving, preheat the oven to 200 degrees while the oatmeal is soaking and keep waffles in the oven, on a baking sheet lined with foil, up to 30 minutes before serving. Waffles will keep, refrigerated, up to a week, and frozen up to a month.

Almost every Thursday, for some time now, I’ve been posting recipes using different flours or flour alternatives, like almond meal, and calling it “Variety Flour Thursday” (the name isn’t wholly necessary, but I liked that it made my “variety flour” adventures sound more official). It started as a result of my wanting to branch out of the all-purpose flour bubble more often, to experiment with different flavors, textures and make me feel better about baking so much, health-wise. Up until this point, I’ve only made recipes either already featuring different flour or recipes that according to my research and prior experience I knew would turn out well using something other than all-purpose flour. There haven’t really been any shots in the dark, where I just did a crazy substitution to see what would happen and that thought made me a little sad, sad because I go through the world pretending to know what happens when I do certain things or make certain decisions or what happens when you either let someone go or welcome someone into your life. Sometimes you just don’t know how something you do will affect the world around you because there are always a million things you’ve never thought about and a million things that we can’t know ahead of time. You may have a good idea of an outcome, but life tends to throw things your way that never would have figured in your radar.

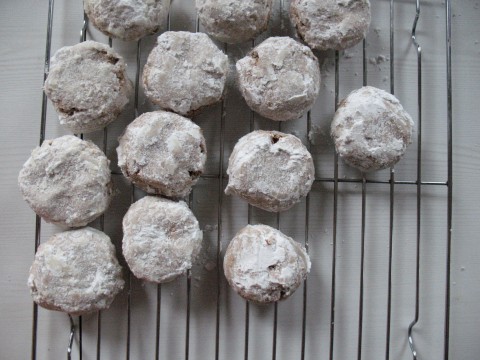
This is one of the ways, still in a relatively controlled environment, that I can let go and make crazy decisions just to see what happens. Luckily I’m armed with a little bit of experience, but it always ends up that the more you know, the more you become aware of how much you don’t know. I wanted to make some meltaway cookies. I have a TON of whole wheat flour in the pantry (due to an extremely generous room mate). Could whole wheat flour work in a meltaway, or would it completely destroy the idea of having a light cookie that simply, like its name implies, melts in your mouth? I took the plunge and substituted the entire amount of whole wheat flour for all-purpose, keeping the amount of almond meal in tact. Since whole wheat flour absorbs more liquid than all-purpose, I had to add about 2 tablespoons milk to the batter in order for it to come together. All well and good. I baked the cookies and found the bottoms browned more than usual for a meltaway, but that might be due to old, non-stick pans instead of my choice flour. The flavor? Meh. The cookies, when you substitute whole wheat flour, take on more of a thumbprint/shortbread texture, ceasing to be light and airy. Delicious, certainly, but not a meltaway.

I feel good, even though I didn’t get the end result that I wanted or expected, for branching out and taking a chance to see what happened. You learn by doing, right? All that being said, I wonder if using whole wheat pastry flour would give you the expected airiness of a meltaway? An adventure for another time. Now I know, for sure, from personal experience, that whole wheat flour is not what you should use for a meltaway. Included in this post is the original recipe from the blog, A Cup of Freck. I’d suggest following directions and using all-purpose!

Almond Meltaways

(Recipe adapted from A cup of freck)

Yields 30 cookies using a cookie scoop


Ingredients:

1 cup unsalted butter, room temperature

1/2 cup powdered sugar

1/2 teaspoon salt

2 1/4 cups all-purpose flour

2 cups almond meal, or almonds ground in a food processor

3 tablespoons amaretto liquor OR 1 teaspoon almond extract

Powdered sugar for rolling cookies (at least one cup)


Method:

1. In a large mixing bowl, cream butter and powdered sugar.

2. Add salt, flour, and almond meal to butter mixture and stir until dough comes together.

3. Stir in almond extract.

4. Chill dough in fridge for one hour. During chill time, preheat oven to 350 degrees F and prepare a cookie sheet (if not using a non-stick pan).

5. Either using a cookie scoop or by hand, form tablespoon-size balls of dough and place on prepared or non-stick cookie sheet. The cookies will not spread much, so they can be placed as little as an inch apart.

6. Bake in preheated for 15 minutes. Let cool on baking sheet for a few minutes, until cool enough to handle, and roll in powdered sugar then place on cooling rack. Once cookies are cool, roll again in powdered sugar.

Store cookies covered at room temperature up to 3 days.


These cookies come to you sans story. In elementary school we learned that the key to a good story, or any story, is a hook in the first paragraph or sentence, and I realize beginning a blog entry with a complaint about not having a story is not necessarily the way to make people want to read what you have to say. Now that I’m thinking about it, it’s almost as if I baked these cookies because I didn’t have anything to say.

I’m re-reading that first paragraph and shaking my head in shame. Sorry, folks. I’ll try to explain.

Baking is something that I fell into and love for many reasons. It engages my brain and my senses, almost like flipping a switch that makes me more conscious of the world around me and all the amazing things that can happen when you combine certain parts of the world – research and ingredients and recipes and baked goods being a kind of microcosm of the world in general. Conversely, baking allows me to disengage when I need to, in the sense that the process has become so natural to me that the mechanics are soothing, and the baked good at the end of the journey is of great comfort to my sometimes overly exhausted mind. I baked these cookies on a whim because I love the blog they came from, had the ingredients on hand, and had to take a serious mental vacation, if only for an hour or two.

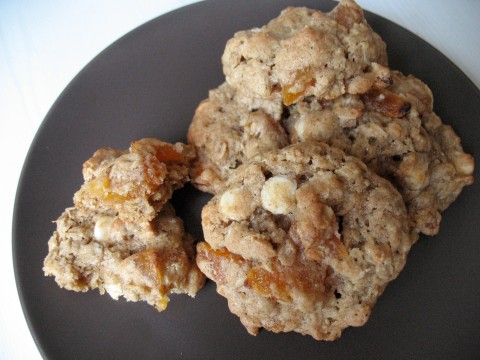
The bloggers who made these white chocolate apricot oatmeal cookies were not super impressed with them, but I definitely loved them. It might just be that I’m a total sucker for dried apricots, and oatmeal in any way, shape, or form. Verdict is still out on that one.

Before sending you out into the world with this recipe, I’ll pass along a tip I learned while reading about oatmeal cookies. Most of the recipes I’ve read concerning these treats say that chilling the dough for the appropriate amount of time is key to a chewier, thicker cookie. Some say that the cookie dough is best after an evening in the fridge, and some recommend scooping the cookies onto a baking sheet, freezing them, and baking them as needed (which you can do for just about any cookie). I definitely noticed a difference between the cookies that got more time in the fridge before baking and the ones who were able to stay cold a little longer. I say this because I’m usually that person who sees chilling time in a cookie recipe and makes the executive decision (of an impatient cookie monster) to skip it, and in this case it really paid off to be patient.

Also, happy Memorial Day!

White Chocolate Apricot Oatmeal Cookies

(Recipe adapted from The Bitten Word)

Yields about 4 dozen cookies


Ingredients:

1 ½ cups all-purpose flour (or 1 cup whole wheat flour and ½ cup all-purpose)

1 ½ cups old fashioned, or rolled, oats

½ teaspoon baking soda

1 cup, or 2 sticks, unsalted butter, softened

¼ cup granulated sugar

1 cup light brown sugar, packed

1 teaspoon salt

1 teaspoon vanilla extract

2 eggs

8 ounces white chocolate, chopped or chips

7 ounces, or 1 ½ cup, dried apricots, chopped (I chopped the apricots pretty irregularly and really liked the different-size pieces in the finished product.)


Method:

1. In a medium-size mixing bowl, stir or whisk together flour, oats, baking soda, and salt. Set aside.

2. In a large mixing bowl, or bowl of a stand mixer, cream together butter and sugars until light and fluffy.

3. Stir in eggs and vanilla extract (on low speed, if using a stand mixer) and beat until well combined.

4. Gradually add flour and oat mixture just until combined. Stir in chopped apricots and white chocolate.

5. Cover cookie dough and refrigerate for at least a half hour. While dough is in the fridge, preheat oven to 350 degrees F and line baking sheets with parchment paper.

6. Scoop cookies by the tablespoonful (or with a cookie scoop) onto baking sheets, spacing them about 2 inches apart because the cookies will spread a bit. Bake cookies for 14 to 16 minutes.

7. Let cookies cool on baking sheets for 2 to 5 minutes before removing to a cooling rack to cool completely.

Store in an airtight container at room temperature up to 3 days.

This post begins with a warning. My roommate (bless her heart and soul) came home from work the other night with three bags of whole wheat flour and gave me full access to them. What does that mean? You’ll probably be seeing a whole bunch of recipes using whole wheat flour, on Variety Flour Thursdays and beyond. “Warning” was perhaps too strong a word. Consider this a “heads-up” then.

As much as I appreciate all flours, as they provide the basis to some of my favorite things in the entire world, whole wheat flour is definitely in my top two favorite flours to use (the other being buckwheat). Not only does using whole wheat flour make it easier for me to pretend what I’m making has some sort of health benefit other than being delicious, but it also lends a more interesting, earthy flavor. Your baked goods have a bit more oompf. There are even options to use whole wheat flour in fluffy cakes and delicate pastries – whole wheat pastry flour and even white whole wheat flour to a certain extent.

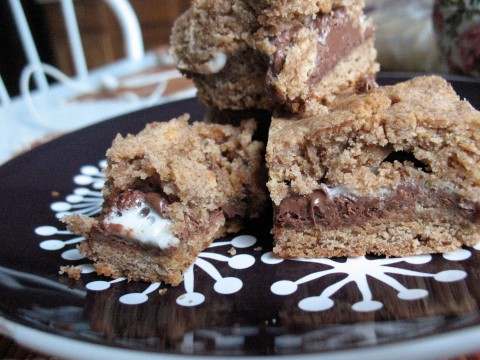
My preferred way to use whole wheat flour? Cookies. I love the chew factor and nutty flavor that whole wheat flour can give to cookies without being overpowering or ruining the texture. This week I was feeling like something extra gooey and ridiculous melty, so I decided to make a s’mores treat and substitute some whole wheat flour in for all-purpose to see what happened. Much to my delight, adding whole wheat flour to these bars was a success. However, I didn’t follow the instructions and used marshmallows instead of marshmallow fluff, even though it was clearly stated in the original recipe. I was way too lazy to go back to the store and paid for it. The bars were great, don’t get me wrong, but the marshmallows kind of evaporated (as they tend to do when baked) and left the bars with the occasional white puff and a thin layer of sweet. So, word to the wise, follow the instructions and use marshmallow fluff to get optimal gooey-ness.

S’mores Cookie Bars

(Adapted from Crepes of Wrath)

Yields one 8 inch square pan of bars, between 16 and 20 bars

Ingredients:

½ cup, or 1 stick, unsalted butter, room temperature

¼ cup light brown sugar

½ cup granulated sugar

1 large egg

1 teaspoon vanilla extract

1 1/3 cups all-purpose or whole wheat flour

¾ cup, about 8 whole crackers, graham cracker crumbs*

1 teaspoon baking powder

¼ teaspoon salt

2 king-size milk chocolate bars, or about 1 ½ cups chopped milk chocolate

1 ½ cups marshmallow fluff (not marshmallows, as we’ve learned!)

*If you have a food processor, you can pulse the graham crackers to get crumbs. If you, like me, lack this marvelous kitchen tool, you can crumble the crackers by hand or with an appropriate kitchen tool (like a potato masher). It takes longer and you don’t get as fine a crumb, but it works!

Method:

1. Preheat oven to 350 degrees F and either grease or line with parchment an 8 inch square baking pan. Lining with parchment is nice because you can just pull the bars out of the pan when cooled.

2. In a large mixing bowl, cream together butter and both sugars until light and fluffy.

3. Beat eggs and vanilla into butter mixture until fully incorporated.

4. In a smaller mixing bowl, whisk together flour, graham cracker crumbs, baking powder, and salt.

5. Add dry ingredients to butter mixture and stir until all ingredients are combined. Divide dough in half.

6. Press half of the dough into the bottom of pan. Next layer chocolate over dough, then marshmallow fluff over chocolate, and, finally, press remaining the half of dough on top. It’s okay if there is some marshmallow visible through pressed dough on top.

7. Bake in preheated oven for 30 to 35 minutes until top is lightly browned. If corners brown too quickly, as mine did, cover edges with tin foil.

8. Let bars cool completely before cutting into squares.

Keep bars covered, at room temperature, up to three days.

I seem to be suffering from the never-ending cold, complete with new and different symptoms every few days. You know how when you are sick words on pages seem to dance circles around you? And the pictures seem to jump up off the page and wander? This made it very difficult for me to research my Variety Flour Thursday pick this week, but nothing is impossible. I gathered my blankets and shuffled to the kitchen to survey my cookbooks and ingredients.

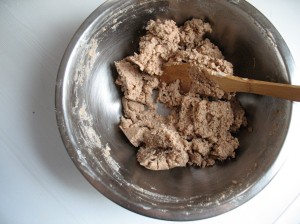
I never tired of cookie dough landscapes, especially this one, flecked with blood orange zest!

Luckily for me, I had blood oranges in the fridge and agave nectar in the pantry. I can present a cookie that is a little out of the common way, containing significantly less refined sugar than your average cookie. My mother went on an agave nectar spree last year, either buying it for everyone she knows or convincing them it’s the miracle sweetener we’ve been searching for all these years. I was a grateful recipient and used it on pancakes and in tea. I hadn’t used it to bake before this recipe and now that I’ve seen the results, I’ll try using it more often.

And blood oranges? There’s nothing to be said about this extraordinary fruit. It’s my favorite and makes a wonderful addition to most baked goods (and my life).

Orange Agave Chocolate Chip Cookies

(Recipe adapted from Vegan Cookies Invade your Cookie Jar)

Yields 2 dozen generous tablespoon size cookies

Ingredients:

2/3 cup agave nectar

2/3 cup canola oil

2 tablespoons nondairy milk (or water in a no-milk emergency)

(Optional: 1 tablespoon ground flax seeds)

1 ½ teaspoons vanilla extract

1 tablespoon orange zest (grated zest of one orange approximately)

1 ½ cups all-purpose flour

1 cup whole wheat flour

¾ teaspoon baking soda

¼ teaspoon salt

1 cup, or 6 ounces, chocolate chips or chopped chocolate

Method:

1. Preheat oven to 325 degrees F and line two baking sheets with parchment paper.

2. In a large bowl, whisk agave nectar, oil, nondairy milk, flax seeds if using, vanilla extract, and orange zest until smooth and homogenous.

3. Sift in flours, leavening agents, and salt. Stir to combine, until there are no flour streaks.

4. Add chocolate chips. Stir to incorporate.

5. Form cookies into generous tablespoon-sized disks. These cookies barely spread and rise only slightly, so how they look before baking will be how they look after baking.

6. Bake each sheet in the oven for 12 to 14 minutes, until the edges are slightly golden.

7. Let cookies cool on baking sheet for at least 5 minutes before removing them to a cooling rack to cool completely.

Store these cookies in an airtight container at room temperature for up to 5 days.

See this recipe on Sweet As Sugar Cookies for Sweets for a Saturday #7!