Breakfast Tuesday: Baked Quinoa
November 15, 2011
Not sure about you guys, but I’m always AMAZED by how quickly time flies this time of year. During the first week of November, Halloween feels like it either happened months ago or never happened at all. By mid-November, time has completely warped and I can’t tell difference between morning, afternoon, and night, and certainly can’t be bothered to remember what day of the week it is. It might have something to do with the time change, or the all-consuming fear of impending sucky weather, or the craziness of working retail during the busiest of all retail seasons, but it’s mostly my tendency to completely zone out when busy and stressed.
Finally having time to sit down and look at a calendar, I realized it was Tuesday again. Already? Wasn’t it just Tuesday? I didn’t have time to bake something new and exciting for my breakfast post and was pretty bummed out. I went about my morning business, earlier than usual on account of being busy, and prepared a dish that has become part of my weekly breakfast routine. I had a mini blog-piphany, thinking about how food only makes it into my meal routine if it’s amazing and thinking that it’s high time I share this particular recipe.
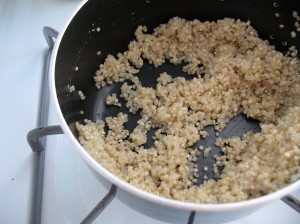
So, while I’m shaking my fists at the sky and wondering what the HECK happened to my week, I leave you with one of my favorite breakfast recipes: baked quinoa. It’s super easy and super satisfying, and I guarantee you’ll find yourself wanting it again and again after making it once. The only change I make is to add one egg instead of two, and sometimes I vary the level of sweetener, depending on my topping of choice. Happy Breakfast Tuesday, everyone!
Breakfast Tuesday: Oatmeal Banana Raisin Waffles (Vegan)
November 1, 2011
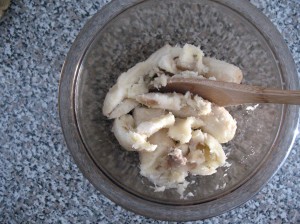
Bananas. I’m not sure I could do with out them. So you’ll understand my feelings when, right after returning home from the grocery store, I dropped my precious four bananas on the ground. The horror! Dropping any fruit is bad, but I feel like bananas take it the worst. The insides turn to banana pulp! Crazy! And the way I dropped them was such that more than half of each banana was horribly bruised by the impact. I tried opening one to eat but couldn’t do it without a spoon, and I was a little put off by the bruising. Feeling sad and defeated, I put them in the fruit basket and tried to forget about the whole incident.
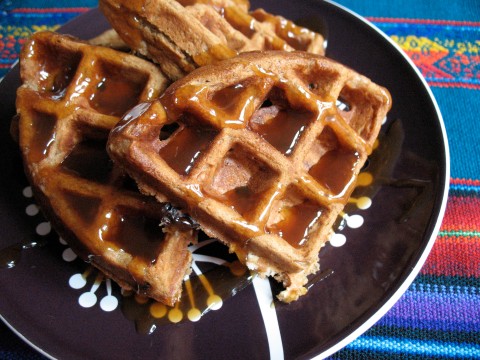
About four days later, the bananas started to get spotty. I was worried; I didn’t want to throw them out but didn’t want to eat them as is. What was I to do? A little voice sounded inside my ear and said things like, “You bake things! Bake banana things! You paid for those bananas! Use them!” I usually eat bananas too quickly to allow them to ripen, which means I don’t get the chance to bake with them. Not this time! So all is not lost, in fact, my love for banana baked goods is found again, especially with these waffles. The banana flavor isn’t pronounced, but you know it’s there, and you’ll love how the banana is complimented by oatmeal, cinnamon, and raisins. I’m going to count the banana dropping as a blessing this morning (but I promise to be more careful next time). Happy bananas for breakfast! Happy Breakfast Tuesday!
Oatmeal Banana Raisin Waffles
(Recipe only slightly adapted from Vegan with a Vengeance)
Yields exactly 4 Belgian waffles or up to 12 regular waffles
Notes: Instead of using both all-purpose and whole-wheat flour, you can use one cup and two tablespoons all-purpose flour. If you decide to use quick cooking oats, you don’t need to soak the oats in liquid mixture before adding to dry ingredients. If you don’t have nondairy milk on hand and/or don’t require waffles to be vegan, substitute whatever milk you have on hand.
Ingredients:
½ cup plus 2 tablespoons all-purpose flour
½ cup whole-wheat flour
2 teaspoons baking powder
1 teaspoon baking soda
1 ¼ teaspoon ground cinnamon
¼ teaspoon ground nutmeg
½ teaspoon salt
1 cup rolled, or old-fashioned, oats
1 very ripe banana, mashed well
1 ½ cups nondairy milk
3 tablespoons maple syrup
3 tablespoons vegetable oil
¾ raisins
Method:
1. In a large mixing bowl, whisk together flour, baking powder, baking soda, cinnamon, and nutmeg.
2. In a medium-size mixing bowl, mix together oats, banana, milk, syrup, and vegetable oil. Let mixture soak for 10 minutes while you preheat the waffle iron.
3. After ten minutes, pour wet ingredients into dry and mix just until combined. A few lumps will remain. Fold in raisins, taking care not to over mix.
4. Waffle according to manufacturer’s instructions, greasing waffle iron between waffles.
If you would like to keep the waffles warm between taking them off the iron and serving, preheat the oven to 200 degrees while the oatmeal is soaking and keep waffles in the oven, on a baking sheet lined with foil, up to 30 minutes before serving. Waffles will keep, refrigerated, up to a week, and frozen up to a month.
Breakfast Tuesday: Chocolate Peanut Butter Plantain Muffins
October 25, 2011
The word “amalgam” kept popping up in the article I was reading this morning, before I embarked on my Breakfast Tuesday endeavors. It’s a word I grew close to, and practically fell in love with, during my time in graduate school. I always thought “amalgam” and all its variants were apt words to use when talking about literature because it’s a word with a huge scope, a word that makes sure you know that there are many, many things you can and should consider when looking at other words on a page. It reminded me that words aren’t just words; they are words with past definitions, words coming out of someone’s mouth, words used while thinking about other words, etc. Looking it up now, though, I see the definition is a lot more straightforward. Apparently, an “amalgam” is primarily an alloy used for filling teeth, and only secondarily a “mixture of different elements”. I guess being immersed in a world where poetry is practically shooting out of your eye sockets makes you see and understand things differently (and abstractly, it seems).
Regardless of the dictionary definition, it kept jumping off the page and grabbing my attention, basically screaming at me, and then hopping around to each corner of my mind. I remembered how much I loved the word because I loved thinking about the world as a seamless combination of all things past, present, and future. I browsed breakfast recipes, to share this Tuesday, in this state of mind and felt compelled to throw a bunch of ingredients together into one, self-contained, breakfast food. Muffins seemed perfect for the job because you really can just throw a bunch of pantry/fridge/fruit basket ingredients together to make your own baked and breakfast appropriate amalgamation. According to my poetically-stretched and partly made-up definition, at least!
(PS- Fun fact: The online dictionary lists “cocktail” as a synonym for both “amalgam” and “amalgamation”.)
Chocolate Peanut Butter Plantain Muffins
(Recipe adapted from Handle the Heat, originally “Chocolate Banana Muffins”)
Yields 12 muffins
Notes: Since the original recipe did not call for peanut butter, you could easily skip it, and, if you’re craving a sweeter breakfast, you can fold one cup chocolate chips or chopped chocolate into the batter before transferring it to the tin.
Ingredients:
3 very ripe plantains, mashed
¼ cup creamy peanut butter, melted and slightly cooled
¾ cup granulated sugar
1 large egg
1/3 cup unsweetened applesauce
½ cup whole-wheat flour
½ cup all purpose flour
½ cup unsweetened cocoa powder
½ teaspoon salt
1 teaspoon baking powder
1 teaspoon baking soda
Method:
1. Preheat oven to 375 degrees F and line muffin tin(s) with cupcake papers or grease individual muffin cups.
2. In a medium bowl, whisk together flours, cocoa powder, salt, baking powder, and baking soda until completely combined.
3. In a large bowl, whisk together plantains, peanut butter, sugar, egg, and applesauce until completely combined. Add flour mixture to wet mixture and fold ingredients together until just combined. Be careful not to over mix.
4. Fill each muffin cup almost to the top with an equal amount of muffin batter.
5. Bake muffins in preheated oven for 20 minutes, or until a cake tester inserted into a muffin comes out clean.
6. Cool muffins in pan for a few minutes before removing to a cooling rack to cool completely.
Muffins are best the day they are made, but can stay in an airtight container at room temperature up to two days. You could also freeze the muffins, baked or unbaked, up to a month, reheating or baking as needed.
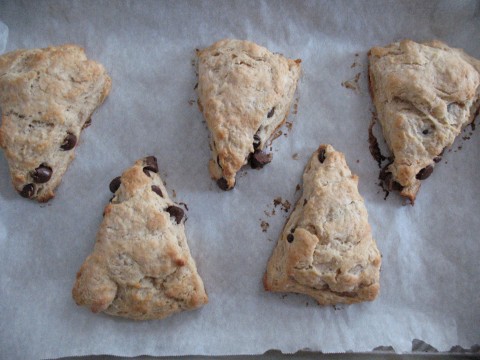
Breakfast Tuesday: Peanut Butter Chocolate Chip Scones
October 11, 2011
it’s 10 o’clock at night and I’m trying to write a post about the breakfast I made over twelves hours ago. I was thinking about putting it off until tomorrow, or even the next day, and could think of a bunch of excuses to justify it. I’ve been sick these last few days and feeling overwhelmingly tired stupidly early in the day. I got called into work on a day off, but had to go in because, hey, who doesn’t need the money? School applications are breathing down my neck and there are a million people with whom I have to get back in touch. I’m not even sure if people expect me to post a breakfast recipe on Tuesday, so what’s the point?
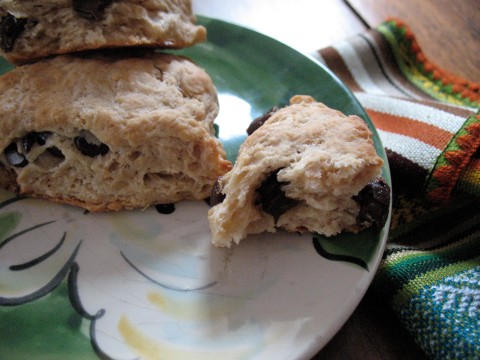
Now what? What is the point? That kind of thinking sucked me into a pretty dark spot, sitting here, writing this. I guess what’s keeping me going is the fact that I woke up super early, despite having to go into work and despite being sick, so I could make something fun to eat and share. I even made two batches of scones because the first recipe didn’t turn out as delicious as I thought it might. It was obviously important to me that I make the effort here and try my best to keep my word, even if my word means something as simple as making scones and posting pictures of them on the internets. Also, who doesn’t love peanut butter and chocolate in the morning?
Peanut Butter Chocolate Chip Scones
(Recipe adapted from bakingsheet)
Yields 16 smallish scones
Notes: There are two things that almost guarantee perfect scones: using very, very cold butter and working the dough quickly with your hands. I always cut my butter into the smallest cubes possible and stick them in the fridge for about 15 minutes before using.
Ingredients:
3 cups all purpose flour
1 tablespoon baking powder
½ teaspoon salt
2 tablespoons brown sugar
10 tablespoons butter, cut into ½ inch cubes and very cold
4 tablespoons peanut butter
1 cup and 2 tablespoons milk
1 teaspoon vanilla extract
½ cup chocolate chips
Method:
1. Preheat oven to 400 degrees F and line a baking sheet with parchment.
2. In a large mixing bowl, whisk together flour, baking powder, and salt.
3. Add peanut butter and cubes of butter to flour mixture and mix with your hands until mixture resembles coarse crumbs. Mix in chocolate chips.
4. Combine milk and vanilla extract, and then add to dough. Mix with your hands until just combined, then turn out onto a clean, floured surface and knead once or twice. This process should go very quickly and dough will be lumpy.
5. Split dough into 2-3 discs, about one to one-and-a-half inch thick, and cut into wedges.
6. Place wedges two inches apart on the baking sheet and bake each sheet 16-20 minutes, until edges are light golden brown.
7. Cool wedges on a baking sheet until cool enough to eat.
Storage: Scones do not store well, so I only bake enough scones to eat. To freeze ready-to-bake scones, just place unbaked wedges on a baking sheet and freeze until solid. Store frozen wedges in an airtight container or freezer bag until ready to bake and serve. You may have to add an extra two or three minutes to the baking time, but other than that everything is the same!
Breakfast Tuesday: Banana Quinoa Waffles
October 4, 2011
For a few months, I was making waffles left and right. If I had an ingredient, I put it in a waffle (which sounds a lot like both my chocolate chip cookie and oat bran philosophy – creature of habit and hedonism, I guess). Chocolate waffles! Bran waffles! Malt waffles! Pumpkin waffles! All of the waffles! One fateful morning, however, I attempted to make waffles and the result could only be described as waffle genocide. So many good waffles split in half, burnt, and crumbled in my hands. I thought it was the recipe, and then I thought it was me, and then, having rejected the first two options as improbable, I decided to blame the waffle maker. And then I was stuck. I didn’t want to look into buying another waffle maker because I wasn’t a hundred percent sure it was malfunctioning, but I didn’t want to try another waffle recipe because I couldn’t deal with the sadness and guilt that comes from massacring one of the breakfast treats I consider most sacred.
This dilemma kept me from making waffles for far too long. In every bizarre-o kitchen appliance grudge (those who use a lot of kitchen appliances hopefully know what I mean), there comes a time where someone has to give in, and that someone is usually the person. Because it would be hard for the appliance to give in. And it would be a little scary, too, if it actually had the capability to give in. Anyway, the waffle maker and I had a long talk (which, if you’re wondering, looks a lot like me glaring at a waffle iron until tying up my apron and getting on with it), and I decided to give it another go. Turns out my waffle iron responds really well to aerosol oil and not well at all to any other method of greasing. Huh. Looks like Colleen the Waffle Machine is back in business.
These waffles are amazing, though on the hearty side of the breakfast good spectrum. My roommate, K, really enjoys them, and she prefers her breakfasts to be more healthy than sweet, whereas I’m the opposite. We both agree that these waffles make a great breakfast, though! Something about the quinoa-banana-cornmeal combination and the fluffiness on account of whipped egg whites makes these waffles suitable for any kind of breakfast eater.
Happy Breakfast Tuesday, because it’s a happy one indeed!
Banana Quinoa Waffles
(Recipe adapted from The Family Kitchen)
Yields 7 Belgian style waffles
Notes: The original recipe is for spiced waffles – add one teaspoon ground ginger to dry ingredients. For my particular waffle iron, I got the best results with the heat set at six (out of eight) and leaving the waffle in iron for 5 minutes, then flipping the waffle and letting it heat for one more minute before taking it out.
Ingredients:
½ cup, or one stick, unsalted butter
1 ½ cup all-purpose flour
½ cup fine cornmeal
1 tablespoon baking powder
¼ teaspoon salt
½ teaspoon ground cinnamon
2 ripe bananas, mashed
3 eggs, separated
3 tablespoons honey
¾ cup cooked and cooled quinoa
1 ¼ cup milk
Method:
1. Preheat waffle iron.
2. In a small saucepan or microwave, melt butter. Set aside.
3. In a medium mixing bowl, whisk mashed bananas, honey, egg yolks, melted butter, quinoa, and milk together until combined. Set aside.
4. In a large mixing bowl, whisk flour, cornmeal, baking powder, salt, and spices together.
5. In yet another mixing bowl, or bowl of stand mixer, whip egg whites to stiff peaks.
6. Fold wet ingredients into dry until just combined, and then gently fold in egg whites.
7. Waffle according to manufacturer’s instructions, using 2/3 cup batter per waffle and greasing waffle iron between each waffle.
