Today feels a good day. To me, a good day doesn’t necessarily mean that everything goes my way, or that everything is perfect (and yes, I do have a mental hierarchy of what constitutes different days that could be considered “good,” yay for having a selectively analytical mind). This particular type of good day has nothing to do with anything other than me, sitting in my kitchen, and the space around me; everything seems beautiful and uniquely interesting. I find myself smiling at all the ingredients I’m using for breakfast, even though they are either splayed all over the cutting board or smeared on the counter, and being fascinated by the way my coffee swirls in its cup.

 On these days, I’m acutely aware of being human in the physical sense, and heartily enjoy the simple sensory pleasures one can very easily overlook. I just get so wrapped up in my head, what with being stressed about this and that, feeling bad about something that happened the night before, and missing people who live far away, but today I feel like I can be a girl in a kitchen, smelling her warm, delicious coffee and waiting for chocolate chip pumpkin squares to come out of the oven.

 These chocolate chip pumpkin squares, not quite blondies and not quite cake, are perfect for a good day like this because they are basically small squares of sensory overload. The squares smell like fall and brown sugar, look all orangey-pumpkin beautiful with melty chocolate chips, and, warm from the oven, melt in your mouth. I would even go so far as to say these chocolate chip pumpkin squares could turn a not-so good day around, because you can’t help but stop, smell the roses, and enjoy!

Chocolate Chip Pumpkin Squares

(Recipe adapted from Martha Stewart)

Yields about 24 squares in a 9 by 13 inch pan

Notes: The original recipe calls for all-purpose instead of cake flour and granulated sugar instead of brown sugar, but I love the fine crumb of cake flour and the slight hint of molasses that come together in the finished product. Come next time, I might sprinkle chopped walnuts over the top before baking.

Ingredients:

2 ¼ cups cake flour

1 tablespoon pumpkin pie spice

1 teaspoon baking soda

¾ teaspoon salt

1 cup, or 2 sticks, unsalted butter, room temperature

1 cup brown sugar, packed

1 egg

1 tablespoon vanilla extract

1 cup pumpkin puree

1 1/2 to 2 cups semisweet or bittersweet chocolate chips, or chopped chocolate

Method:

1. Preheat oven to 350 degrees F and line a 9 by 13 inch pan with parchment or greased foil, leaving a few inches overhang to pull bars out of pan once baked.

2. In a medium-size mixing bowl, whisk together flour, spices, baking soda, and salt. Set aside.

3. In a large mixing bowl, cream butter and sugar until smooth. Add egg and vanilla, and then mix until smooth.

4. Add dry ingredients to wet and stir just until all streaks of flour disappear, taking care to scrape the bottom of the pan while stirring. Stir in chocolate chips or chopped chocolate.

5. Spread batter evenly in prepared pan and smooth top. Bake in preheated oven 35 to 40 minutes, or until a cake tester inserted in the center comes out with a few moist crumbs attached.

6. Let pumpkin squares cool completely in pan before lifting out and cutting into individual squares.

Bars can be kept at room temperature, in an airtight container, up to 3 days.

You know what I hate most about the moving process? The moving process. Yes, all of it. It seems like every life skill in which I’m deficient is nicely rolled into one long, boring process. Organization? I know where everything is, thank you, I certainly don’t need to confine myself to one single system. I’ll totally remember what’s in this box when I unpack it, don’t insult me. Oh, I have to pack the box before getting defensive? Well, that’ll be a problem, I’m the queen of not only procrastinating but also coming up with excuses that seem to justify said procrastination. For example: That box doesn’t need to be packed now, for goodness sake, I have a whole ten days! Spelled out, it doesn’t seem convincing, but I’m easily manipulated, even if I’m the one in charge of manipulating… myself? Finally, I have a mental block when it comes to tasks that, once done, have to be undone in a matter of days. Cue reader eye rolls and the utterances of ‘quit yer complainin and DO IT ALREADY.”

Time for a little perspective, just to make sure I keep in mind why moving is important and why the process will be more than worth it. I’m so lucky to be moving into a beautiful new apartment with one of my closest friends. This coming year will be all kinds of awesome if only because we’ll be looking out for each other. She’s helping me move in little by little, knowing that help will be scarce come moving day, because she cares about me and that, well, I could think of all the negative things concerning moving and they wouldn’t even come close to the feeling that someone cares enough about you to go out of their way to help. I’ll definitely miss my one roommate but take great comfort in the fact that she and I will always be friends, no matter where life takes us. She is, after all, my hetero life-mate. She’s stuck with me. (You hear that?! No escape!)

Now that I have some perspective and my excitement is gaining momentum, I need some delicious, sugar-laden comfort food. Something a little like cookie cake. Yeah, that hits the spot. I’ve made this a few times over the past year and loved it every single time, sticking to the original recipe or, in this case, adding some ingredients I want to use up before moving. Check out the peanut butter chocolate chip cookie cake, too!

Chocolate Chip Cookie Cake

(Recipe adapted from Lemonpi)

Serves 8 to 10 people, in a 9 or 10 inch round cake pan

Notes: I added coconut and walnuts but the original recipe just calls for 1 ¼ cups chocolate chips. The final product was a lot less cakey than the original, more like a giant cookie blondie, but I didn’t complain. The almond extract is optional but highly recommended!

Ingredients:

1 cup all-purpose flour

1 ½ teaspoons baking powder

¼ teaspoon salt

1 stick, or ½ cup, unsalted butter, room temperature, plus extra for greasing pan

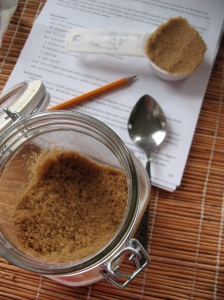
1 cup light brown sugar, packed

1 teaspoon vanilla extract

½ teaspoon almond extract

1 egg

1 cup chopped chocolate, dark, or semi-sweet chocolate chips

½ cup walnuts, toasted and cooled

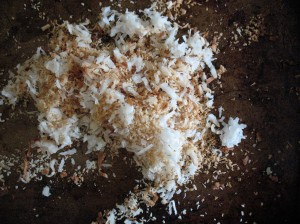
½ cup coconut (mixture sweetened and unsweetened), toasted and cooled

Method:

1. Preheat oven to 350 degrees F and prepare a 9 or 10 inch pie plate, cake part, or fluted tart pan by buttering it generously.

2. In a medium bowl, whisk together flour, baking powder, and salt. Set aside.

3. In a large bowl, cream butter, brown sugar, and extracts, until lighter in color and fluffy in texture.

4. Add egg to butter mixture and beat until combined, making sure to scrap bottom of bowl to incorporate all ingredients.

5. Add flour mixture and stir just until combined well enough that a few flour streaks remain.

6. Stir in mix-ins until just combined and ingredients are evenly distributed throughout dough.

7. Smooth dough evenly in prepared pan. Bake in preheated oven 18 to 22 minutes until sides are puffed and lightly browned. The middle will appear under-baked.

8. If using a cake pan or pie plate, run a butter knife along the sides of cookie cake after taking it out of the oven. Cool in pan until cake reaches room temperature before removing from baking dish.

Store cooled cookie cake in an airtight container at room temperature up to three days or freeze, double wrapped in plastic, up to a month.

In totally unrelated news, there's a tomato on our tomato plant! What a cutie!!

There are some recipes you make once and never make again. It’s not because you weren’t pleased with the end result, or because the technique was too time-consuming, or too this-or-that. You just don’t return to that recipe because there are so, so many other brilliant recipes floating through the world, either tucked away in the pages of books and magazines or floating through the waves of the interweb. I have folders, both manila and digital, bursting with recipes that I’ve made, loved, served, enjoyed, and will probably not make again in the foreseeable future.

When I’m deciding whether or not to file away a recipe there are lots of factors involved, both personal and otherwise. Was this recipe fun to make? Were my roommates hovering around the kitchen, lured by the smell of something sweet in the oven, waiting for the timer to go off? Did I enjoy eating the finished product so much that I completely ignored the chocolate smeared all over my face for at least half a day? Very serious questions, I assure you.

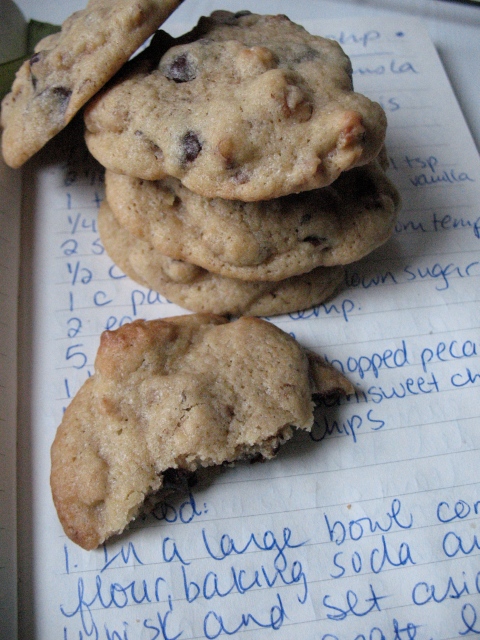
These chocolate chip cookies elicit an enthusiastic “yes” to not only the questions above, but also all the other questions I ask myself while baking. I might go so far as to say that these cookies might even have the answers to life’s questions outside the kitchen. After eating one of these chocolate chip cookies, all your existential questions seem to disappear. That’s how good they are.

I will definitely continue trying new recipes for chocolate chip cookies and will, most definitely, continue to research new and exciting ways to make a chocolate chip cookie recipe stand out from the rest. But when all is said and done, quite frankly, these will be the cookies I make when I am in need of the “real deal”.

Perfect Chocolate Chip Cookies

(Recipe adapted from Cook’s Illustrated)

Notes: I made two batches on two different days, one of which followed the recipe exactly and one of which was slightly altered to accommodate the ingredients I had on hand. What does this mean? Instead of ¾ cup dark brown sugar, I did ½ cup packed light brown sugar and a heaping tablespoon of molasses. Instead of 1 ¼ cups semisweet chocolate, I used 1 cup chopped dark (72% cacao) and ¼ cup milk chocolate. The end results for each batch were each amazingly delicious, maintaining the ever-important balance of chewy-crunchy and chocolate-cookie.

Yields 16-18 hugantic cookies

Ingredients:

1 ¾ cups all-purpose flour

½ teaspoon baking soda

14 tablespoons butter, unsalted

½ cup granulated sugar

¾ cup dark brown sugar, packed

1 teaspoon salt

2 teaspoons vanilla extract

1 egg

1 egg yolk

1 ¼ cup semisweet, or dark, chocolate, chips or chunks

Optional: 3/4 cup chopped pecans or walnuts, toasted and cooled

Method:

1. Preheat oven to 375 degrees F, making sure oven rack is in the middle. Line baking sheets with parchment paper.

2. In a medium bowl, whisk together flour and baking soda. Set aside.

3. In a skillet (preferably not non-stick so you can keep an eye on the color of the butter), heat 10 tablespoons butter over medium-high heat until melted. Continue cooking and start to swirl pan constantly until butter has a deep golden color and starts to emit a warm, nutty smell (1-3 minutes), taking care not to burn the butter. Take skillet off heat and transfer melted butter to a large mixing bowl. Add remaining 4 tablespoons butter to large mixing bowl and stir butter until completely melted.

4. Add both sugars, salt, and vanilla to butter. Whisk until mixture is fully incorporated. Add egg and egg yolk and whisk until mixture is smooth and no sugar lumps remain, not longer than 30 seconds. Let mixture stand 3 minutes, then whisk for 30 seconds, repeating this process two more times – you’ll want to let the mixture stand for a total 9 minutes.

5. Using a rubber spatula or sturdy wooden spoon, stir in flour mixture until just combined. A few lumps of flour are okay at this point.

6. Stir in chocolate and nuts, if using, until there are no more visible flour lumps and mix-ins are evenly distributed throughout.

7. Drop cookies, in 3-tablespoonfuls, onto baking sheets, spacing cookies at least 2 inches apart. These babies will spread.

8. Bake cookies in preheated oven, one tray at a time, for 10 to 14 minutes. Cookies should appear golden and puffy with edges that have begun to set. The centers will appear soft but not to worry, they will set upon cooling.

9. Cool cookies on baking sheet for 5 minutes before transferring to a wire rack to cool completely.

Once cookies are cool, store covered at room temperature up to three days.

I scrutinized the picture accompanying this recipe for a long time, adorable, brown-topped little cakes studded with chocolate chips. No frosting, no frills. Are they cupcakes, really? I mean, does a cake in a cupcake paper need frosting in order to become a cupcake? When you do some research, most people do draw a frosting line between cupcakes and muffins, but I for some reason I can’t rest with that. There has to be more to being a cupcake than a frosted top! Right? I began to question everything I knew about cupcakes, starting with giving this recipe a try.
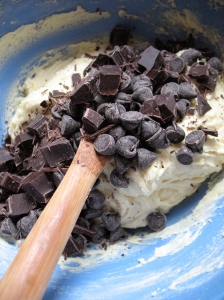
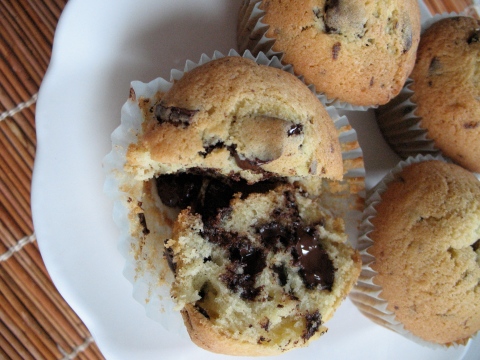
So I went about chopping and mixing and baking and eating. To be honest, I wasn’t a huge fan of the end result. Although I did enjoy the chocolate chips throughout the cake (more cupcakes should have chocolate chips, I daresay), the cakes themselves were dry and, well, I kind of missed the frosting. Perhaps if these were introduced to me as a muffin I would have thought differently, expecting a drier, less sweet cake-type product, but I wouldn’t say they are what you expect when you think “cupcake”. In conclusion, I’m still on the fence regarding whether or not cupcakes need frosting to be considered cupcakes and I’m not sold on this recipe.

I’ll repeat, however, that I’m still intrigued by the idea of chocolate chip cupcakes. If you could pull off a hybrid cookie-cupcake, imagine the possibilities.

Jumbo Chocolate Chip Cupcakes

(Recipe adapted from Cupcakes, by Susanna Tee)

Yields 8 cupcakes

Ingredients:

7 tablespoons unsalted butter, softened

½ cup granulated sugar

2 large eggs

½ teaspoon vanilla extract

1 cup (scant) cake flour

¼ teaspoon baking soda

Pinch of salt

½ to ¾ cup chocolate chips or chopped semisweet, bittersweet, or dark chocolate

Method:

1. Preheat oven to 375 degrees F and line a muffin tin with cupcake papers. I had to do two batches, since my pan only accommodates 6 muffin-size cakes.

2. Cream butter and sugar until light and fluffy. Add eggs and beat until incorporated. Mixture will separate but not to worry! It will come together with the addition of dry ingredients. Add vanilla and stir to combine.

3. Add flour, baking soda, and salt to butter mixture. Stir until just combined, and then stir in chocolate chips.

4. Fill cupcake papers ¾ full, using either “guess-timation” or a ¼ cup ice cream scoop with release mechanism.

5. Bake cupcakes in preheated oven 20 to 25 minutes, or until a cake tester inserted in the center of a cupcake comes out clean. Tops will brown considerably, as a warning.

6. Let cupcakes cool in pan just a few minutes before removing them to a rack to cool completely.

These cupcakes are best eaten while still warm and/or on the same day, but if you must, store them in an airtight container at room temperature up to 2 days.

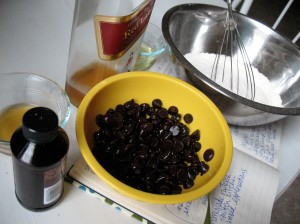
These cookies were so good that I’m not even sure where to begin. Whiskey (or bourbon, or scotch, whatever happens to be in my liquor cabinet at the moment) is one of my favorite ingredients. I love baking with booze, just love it. The flavor of your final product is much more complex, but in a way that’s hard to identify. You simply know something is different. One of the reasons I’m completely enamored with this recipe, with these cookies. They certainly aren’t your normal chocolate chip cookies, though they look the part. When you bake with whiskey the alcohol bakes off and you are left with the sweet, almost-but-not almondy flavor. My powers of description are a mess; I just keep thinking “coooookie”.

Chocolate chip cookies are one of those desserts for which I’ll never stop researching recipes. Just when you think you have a favorite go-to chocolate chip recipe, you find another one that is irresistible and interesting. I’m admitting here, in writing, that these are my new favorite chocolate chip cookies. There’s no doubt that I’ll bake and eat from other recipes, but this is one that has officially made my “must bake again, then forever and ever” list.

You should note that these cookies are best slightly under baked, perfect when taken out of the oven just as the edges start to brown, that way the center stays dense and moist, but the edges are nice and crispy.

Boozy Chocolate Chip Cookies

(Recipe adapted from Une Gamine dans la Cuisine)

Yields around 2 dozen rounded tablespoon size cookies

Ingredients:

2 ¼ cup all purpose flour

½ teaspoon baking soda

¼ teaspoon salt

1 cup, or two sticks, unsalted butter, room temperature

½ cup granulated sugar

1 cup light brown sugar, packed

2 eggs, room temperature

5 tablespoons bourbon, scotch, whiskey (or combination thereof)

1 ½ cup walnuts or pecans, toasted and chopped*

1 ½ cup chocolate chips, or chopped bittersweet/semi-sweet/dark chocolate**

*To toast walnuts or pecans (either before or after they are chopped), preheat oven to 350 degrees F. Spread nuts on an ungreased baking sheet, and bake them in preheated oven for 8 to10 minutes. Let nuts cool before stirring into batter.

** My normal chocolate chip strategy is to use a blend of chopped chocolate, but chips work just as well.

Method:

1. In a large bowl, whisk flour, baking soda, and salt. Set aside.

2. In the bowl of a stand mixer, or separate large bowl, cream butter and sugars together until light and fluffy, about 3 minutes.

3. Beat in eggs, one at a time, scraping down the bowl and beating well after each addition. Beat in alcohol of choice, making sure all ingredients are evenly incorporated before adding flour.

4. With stand mixer on lowest speed or by hand, stir in flour mixture until just combined, or when white streaks have disappeared.

5. With a large wooden spoon stir in walnuts/pecans and chocolate.

6. Cover bowl with plastic and refrigerate for at least 3 hours, otherwise dough will not be manageable.

7. When ready to bake, preheat oven to 350 degrees F. Line baking sheet(s) with parchment paper.

8. Drop cookies by the rounded tablespoonful onto prepared baking sheets about 1 ½ inches apart. Bake each sheet for 8 to 11 minutes (for some reason my cookies took about 12 minutes and still didn’t brown, but these cookies are best when under baked!) or until edges start to brown.

9. Let cookies cool on sheet for a minute before removing them to a wire rack to cool completely.

Store cookies in an airtight container (like a cookie jar!!) for up to 5 days at room temperature.