Nutty (for) Granola?
September 13, 2011
The girl who cried “I don’t like granola!” is making granola… again. I made granola a few months ago, for the first time ever, and remember not feeling anything strong either way. The kicker is that, after thinking about it for an embarrassingly long time, I have what seems like a vague and distant memory of being sad when I had eaten it all. Time-wise, it didn’t make any sense. Why was my initial dislike so bright and vivid, and then my learned appreciation so small and distant?
The answer is pretty simple: I’m so stubborn that it affects how I remember things. That’s pretty ridiculous. Excuse me while I stomp my feet on the ground like a two year old and throw a frustration-induced tantrum. Phew. Okay. Time to put on my big girl pants. I decided to try another granola recipe today, for Breakfast Tuesday, just to see what would happen. Would I try it and be dissatisfied, only to gobble it up within a week? Would I like it upon initial taste-testing? Would I not like it all? I was pretty excited to find out.
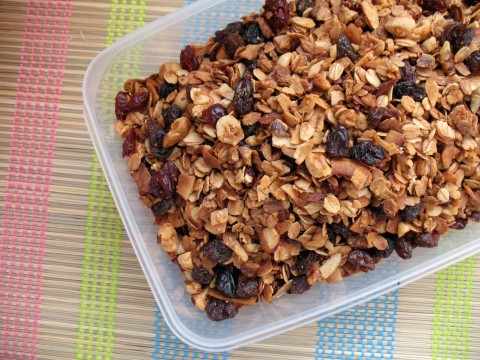
I mixed all my ingredients. Preheated the oven. Melted the butter and honey. Tossed everything together. Spread it out on baking sheets. Put them in the oven. Crossed my fingers. I watched it like a hawk and stirred it every three minutes instead of five, but to no avail. The granola starting burning in the oven about eight minutes before it was supposed to come out. So I took it out of the oven early and let it cool. I tried it and I liked it! Despite the small, burnt walnut pieces and the fact that it was, indeed, granola, I liked it! I’m glad to see that my stubbornness, while getting in the way of lots of things, will not get in the way of enjoying my breakfast on this beautiful Tuesday morning.
Nutty Granola
(Recipe adapted from Emeril Lagasse at Foodnetwork.com)
Yields 7 cups granola
Ingredients:
3 cups old-fashioned oats (rolled)
½ cup slivered or coarsely chopped almonds
½ cup flaked coconut, unsweetened
½ cup walnuts, coarsely chopped
½ cup hazelnuts, coarsely chopped
½ teaspoon cinnamon
½ teaspoon coarse sea salt
4 tablespoons unsalted butter
1/3 cup honey
½ teaspoon vanilla extract
½ cup raisins
½ cup dried cranberries
Method:
1. Preheat oven to 325 degrees F.
2. In a large bowl, stir together oats, almond, coconut, walnuts, hazelnuts, cinnamon, and sea salt.
3. In a small bowl or saucepan, melt together butter and honey. Stir until smooth, and then pour over oat mixture. Stir until butter mixture evenly coats oat mixture.
4. On two non-stick baking sheets, spread oat mixture in a thin, even layer.
5. Bake granola for 15-20 minutes, stirring and switching trays every 5 minutes.
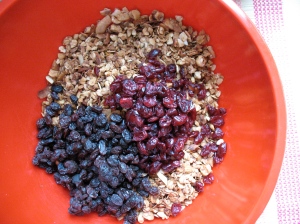
6. Let granola cool to room temperature and then stir in dried fruit.
Store in an airtight container or jar at room temperature for up to a week.
Breakfast Tuesday: Traveler’s Chocolate Muffins
May 31, 2011
Boston is a great city for many, many reasons, one of them being that there is an enormous amount of students who flock here from all over the world (myself included). While living in Boston I’ve met, befriended, and loved so many different kinds of people with so many amazing (and sometimes surprising) talents, and the majority of them eager to learn and explore the world around them. The other side, though, is that most of these extraordinary people need to leave Boston because they just don’t fit. This college town ain’t big enough for the crazy awesomeness, and, in fact, the world is barely big enough.
 I’ve decided to stay here, for now, and it’s bittersweet to see the people I know and love leave. The biggest consolation I have is thinking about how lucky I am to have met the people I’ve met, and how lucky I am to have all the good memories and experiences that I have with them. Maybe that’s why this muffin recipe attracted me, the “traveler’s” chocolate muffin. Something sweet and small to carry with you and to give you a little bit of energy on the journey, or at least a spring in your step, whenever you may need it.
Regarding the recipe itself, I liked the serious chocolate flavor, and the fact that I’m basically eating chocolate cake for breakfast, but the muffins were a little dry. Although they didn’t taste bad, and maybe the dryness is part of this particular chocolate cake product, I’d probably find a way to add some sour cream or yogurt the next time I make these. And, finally, my room mate and I both thought the muffins tasted like some sort of chocolate cereal, which made us giggle. Chocolate cereal muffin! 
“Traveler’s” Chocolate Muffins
(Recipe adapted from Baking and Books)
Yields 12 regular-size muffins
Ingredients:
2 cups all-purpose flour (I used 1 cup all-purpose and 1 cup whole wheat flours)
½ unsweetened cocoa powder
1 to 1 1/3 cup light brown sugar, packed, depending on your sugar preference
½ teaspoon baking soda
2 teaspoons baking powder
½ teaspoon salt
1 ¼ cup milk
1 egg
2 tablespoons olive oil
1 teaspoon vanilla extract
1 cup chocolate, chopped or chips
½ cup walnuts, chopped and toasted
Optional: 2-3 tablespoons granulated sugar for sprinkling
Method:
1. Preheat oven to 350 degrees F and grease muffin tins with baking spray or butter.
2. In a large bowl, stir flour, cocoa powder, baking powder, baking soda, and salt to combine.
3. In a medium-size bowl, stir milk, brown sugar, egg, olive oil, and vanilla to combine.
4. Add wet ingredients to dry and stir just to combine. Add chocolate and walnuts, stirring, again, just until all ingredients are combined.
5. Fill muffin cups ¾ of the way full (I use a ¼ cup ice cream scoop to get even-size muffins) and sprinkle with granulated sugar, if desired.
6. Bake muffins in preheated oven for 20-22 minutes, or until a tester inserted in center comes out clean.
7. Allow muffins to cool in tin for five minutes before removing to a cooling rack to cool completely. To remove, run a butter knife along the sides to loosen muffins, and then pop out of tin.
These muffins are best eaten as soon as possible after coming out of the oven. Keep in an airtight container at room temperature for up to a day.
Variety Flour Thursday: Chocolate Mashed Potato Cake
April 7, 2011
It all (and by “it all” I mean “this post”) started in the used book basement at the local bookstore, where I spend most of my free time and/or that weird in-between time born of serious procrastination before/after/during errands. This used book basement not only has used fiction and poetry and everything nice, but also has used cookbooks. Do I peruse their selection at least once a week? Without a doubt.
 Sometimes the selection of used cookbooks is not as exciting as you think it’d be, and sometimes it’s downright boring, so I try to go in with my only expectation being to have fun looking at pictures, or just touching spines of used books. I was browsing, not ambitiously, when something shiny caught my eye. It doesn’t take much. Much to my delight, the book was a Ghirardelli chocolate book. There was potential and I got excited, opening the book as soon as I plucked it off the shelf. I’ve been disappointed by shiny cookbooks in the past, but the first recipe I saw in this particular shiny slice o’ heaven was for mashed potato chocolate cake. Boom. Consider the purchase done and the cake made.
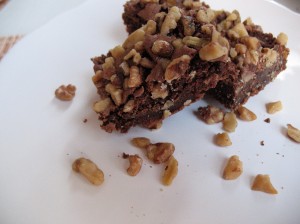
It’s Variety Flour Thursday, but since this is my very own part of the vast and crazy interwebs things will slide this week. Consider it a Variety Ingredient Thursday? Mashed potatoes are kind of like flour, right? Starch? Now I’m just stretching it. The cake itself is not as dense as you’d think it would be because of the whipped egg whites, and the crumb is light. Definitely not at all like some fudgy chocolate cakes you encounter. The cinnamon is a really interesting touch because you don’t taste it as such in the finished product but I really believe the chocolate flavor would be less complex if you forgo the spice.
Chocolate Potato Cake
(Recipe adapted from the Ghirardelli Original Chocolate Cookbook)
Yields one 9 by 13 inch or one bundt cake (if you half the recipe, you can use an 8-inch square pan)
Ingredients:
1 cup unsalted butter, softened
2 cups granulated sugar
4 eggs, separated
1 cup unsweetened cocoa powder
1 cup mashed potatoes*, room temperature
½ cup chopped walnuts
1 ½ cups all-purpose flour
1 teaspoon ground cinnamon
2 teaspoons baking powder
½ teaspoon salt
½ cup milk
*I had to make some mashed potatoes specifically for the recipe, so mine were just plain potatoes mashed with a potato masher. The recipe simply calls for “leftover mashed potatoes”, leading me to believe you could use any sort of mashed potatoes you have lying around.
Method:
1. Preheat oven to 350 degrees F and butter a 9 by 13 inch baking pan or bundt pan.
2. In a medium-size mixing bowl, sift or whisk together flour, baking powder, ¼ teaspoon salt, and cinnamon.
3. Cream butter and sugar until light and fluffy, by hand or with the paddle attachment of a stand mixer.
4. Beat in egg yolks one at a time, beating well and scraping the bowl after each addition.
5. Add cocoa powder and mashed potatoes and mix until smooth. Stir in walnuts
6. Starting and ending with flour mixture, add flour mixture to batter in three parts and alternating with 2 additions of milk. Stirring until just incorporated between each addition, making sure to scrap bottom of bowl.
7. Whip egg whites to stiff peaks and carefully fold whites into batter until incorporated.
8. Pour batter evenly into pan and bake in preheated oven 50 to 60 minutes. If halving the recipe and baking cake in an 8 inch square pan, only bake 35 to 40 minutes.
9. Let cake cool in pan for 10 minutes before removing to a cooling rack to cool completely.
Store cake in an airtight container up to three days or freeze up to a month.

